| Anchor | ||||
|---|---|---|---|---|
|
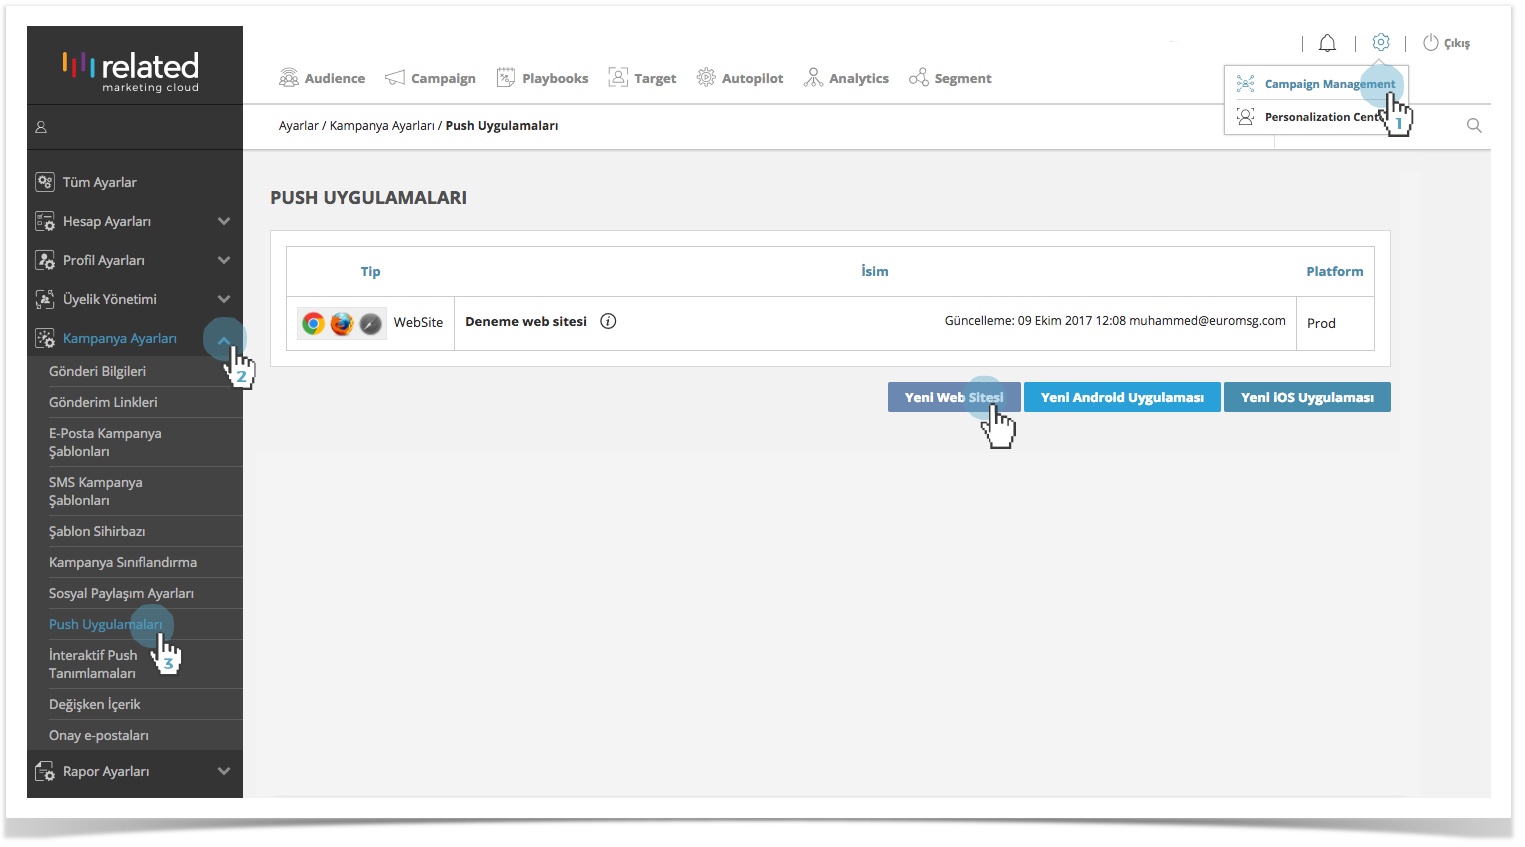
Setup A Web Application on RMC
Go to; Cog Icon > Campaign Management > Campaign Settings > Push Applications > New Website to setup a web application.
| Panel | ||
|---|---|---|
| ||
|
| Note | ||||||||||||||||
|---|---|---|---|---|---|---|---|---|---|---|---|---|---|---|---|---|
Web Push SDK installation steps vary according to site security protocol;
|
| Anchor | ||||
|---|---|---|---|---|
|
| Panel | ||||||||||||||||||||||||||||||||||||||||||||||||||||||||||||||||||||||||||||||||||||||||||||||||||||||||||||||||
|---|---|---|---|---|---|---|---|---|---|---|---|---|---|---|---|---|---|---|---|---|---|---|---|---|---|---|---|---|---|---|---|---|---|---|---|---|---|---|---|---|---|---|---|---|---|---|---|---|---|---|---|---|---|---|---|---|---|---|---|---|---|---|---|---|---|---|---|---|---|---|---|---|---|---|---|---|---|---|---|---|---|---|---|---|---|---|---|---|---|---|---|---|---|---|---|---|---|---|---|---|---|---|---|---|---|---|---|---|---|---|---|---|
| ||||||||||||||||||||||||||||||||||||||||||||||||||||||||||||||||||||||||||||||||||||||||||||||||||||||||||||||||
|
| Anchor | ||||
|---|---|---|---|---|
|
| Panel | ||||||||||
|---|---|---|---|---|---|---|---|---|---|---|
| ||||||||||
|
| Anchor | ||||
|---|---|---|---|---|
|
| Panel | ||||||||||
|---|---|---|---|---|---|---|---|---|---|---|
| ||||||||||
|
| Anchor | ||||
|---|---|---|---|---|
|
| Panel | ||||||
|---|---|---|---|---|---|---|
| ||||||
|
| Anchor | ||||
|---|---|---|---|---|
|
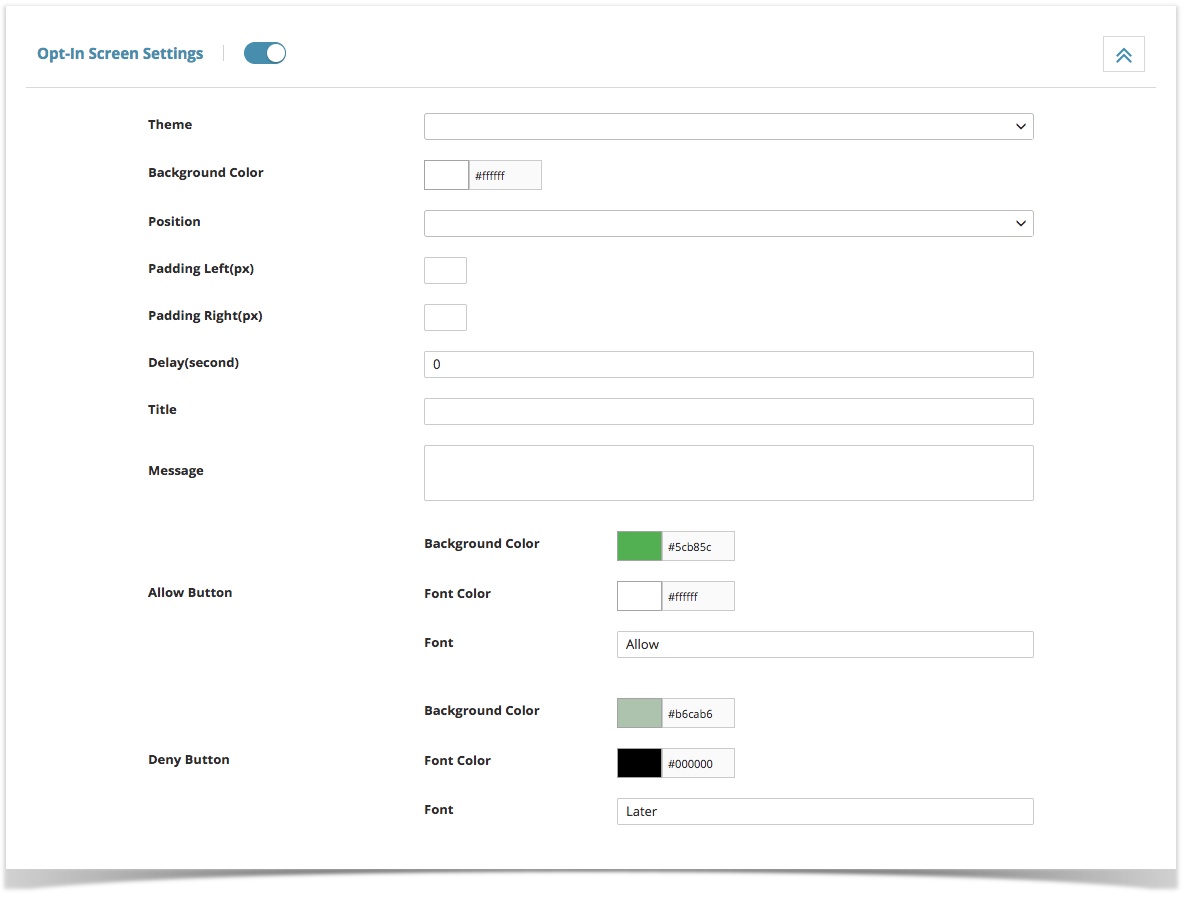
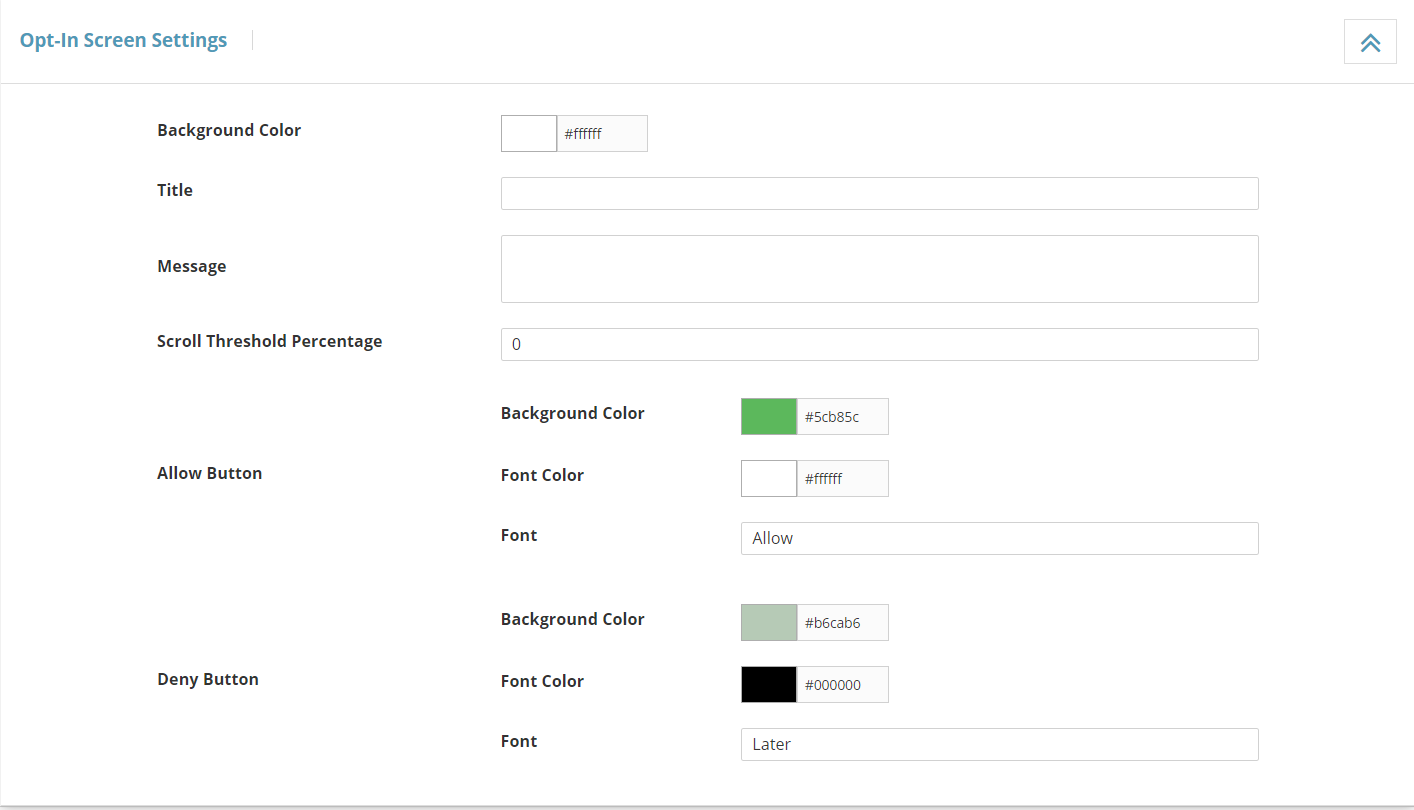
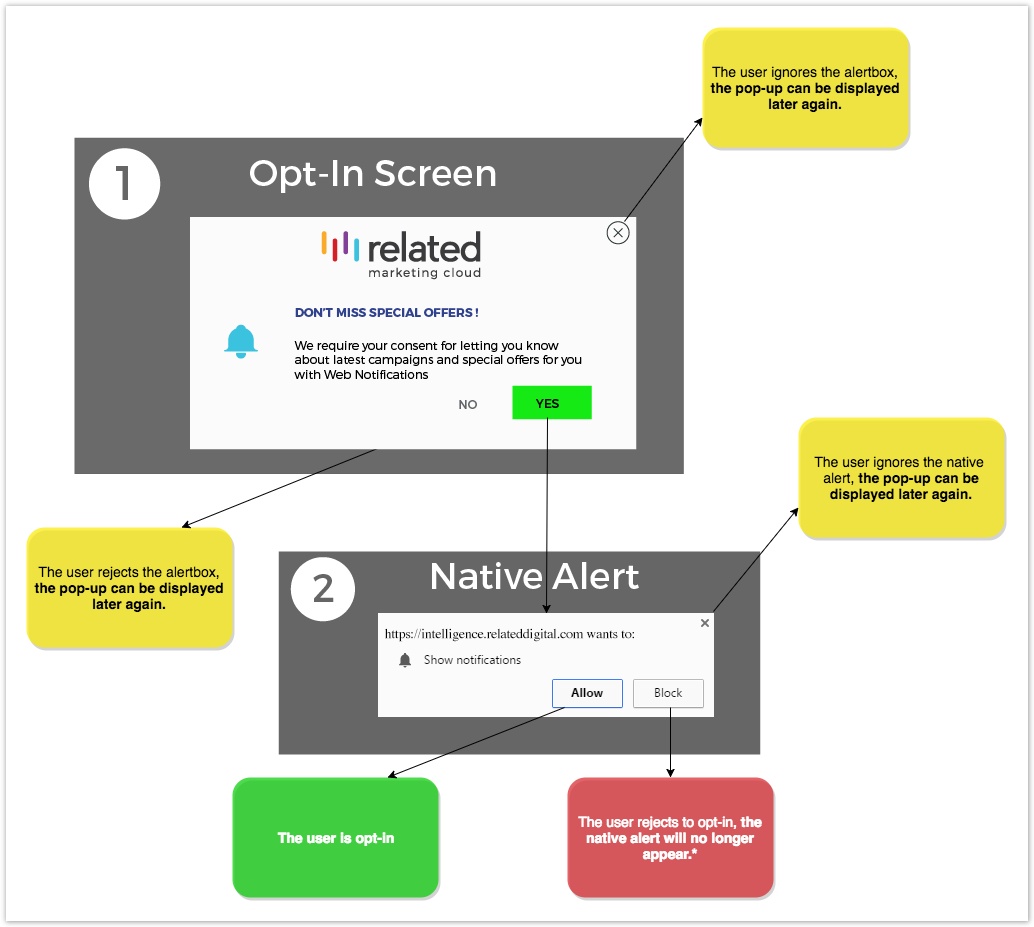
Opt-in Process
RMC, during web push subscription process, in case of non-member users wanting to join again, allows browsers to register via the Opt-In screen primarily instead of using native alerts.
| Panel | ||
|---|---|---|
| ||
*If the visitor does not activate the notification approval from browser settings again. |
Anchor script script
| script | |
| script |
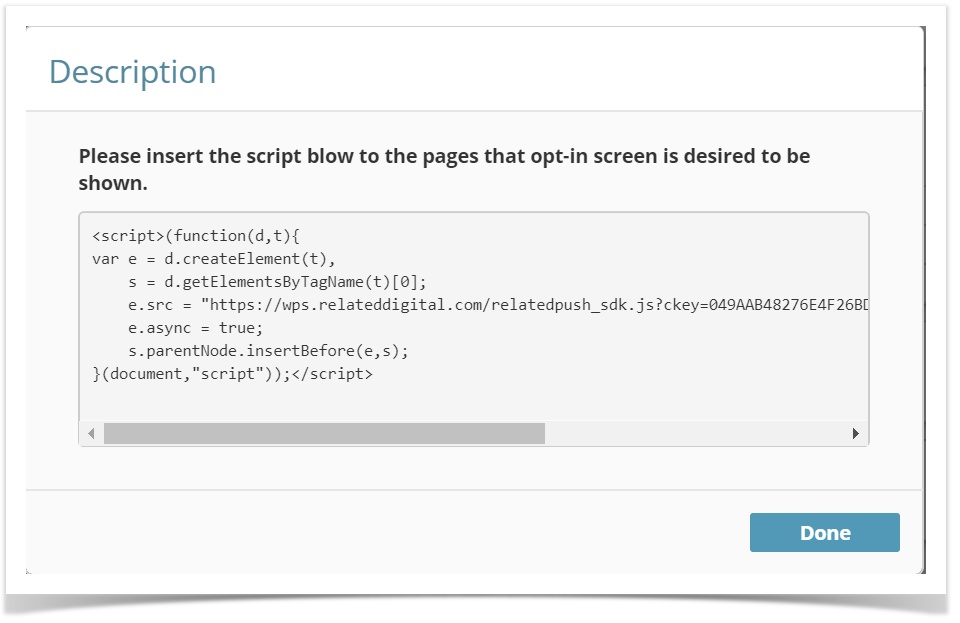
Add Codes and Files to Your Site
| Column | ||
|---|---|---|
| ||
If your website supports HTTPS, you should add the relatedpush_sw.js file in the root folder of your site.
|
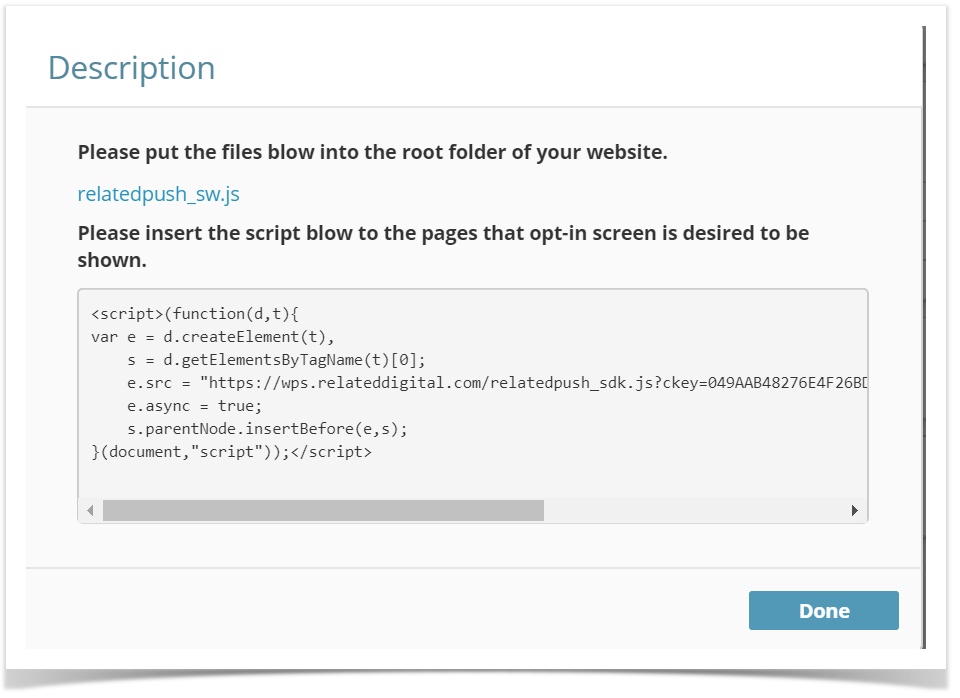
| Tip |
|---|
After completing the required fields, you will find scripts and files created specifically for your configuration on the pop-up. After these scripts and files are added to the places specified in the pop-up, the web push installation is completed. Now, you may proceed to Web Push - Create page to start your first web push campaign. |