Geofencing, belirlenmiş bir coğrafi sınırı tanımlamak için GPS ve RFID(radyo frekansı tanımlama) kullanılması anlamına geliyor. Pazarlamacılar için anlamıysa, yaratılan “sanal bariyere” belirlenmiş kullanıcılar mobil cihazıyla girdiği ya da çıktığı zaman sms, e-posta, push notification gibi pazarlama mesajlarının gönderilebilmesi imkanı. Yani artık pazarlamacılar herhangi bir coğrafi alanı seçip, o alanda kullanıcıylarıyla mobil cihazlar yardımıyla istedikleri şekilde iletişim kurabiliyor.
Yeni Bir Geofence Oluşturma
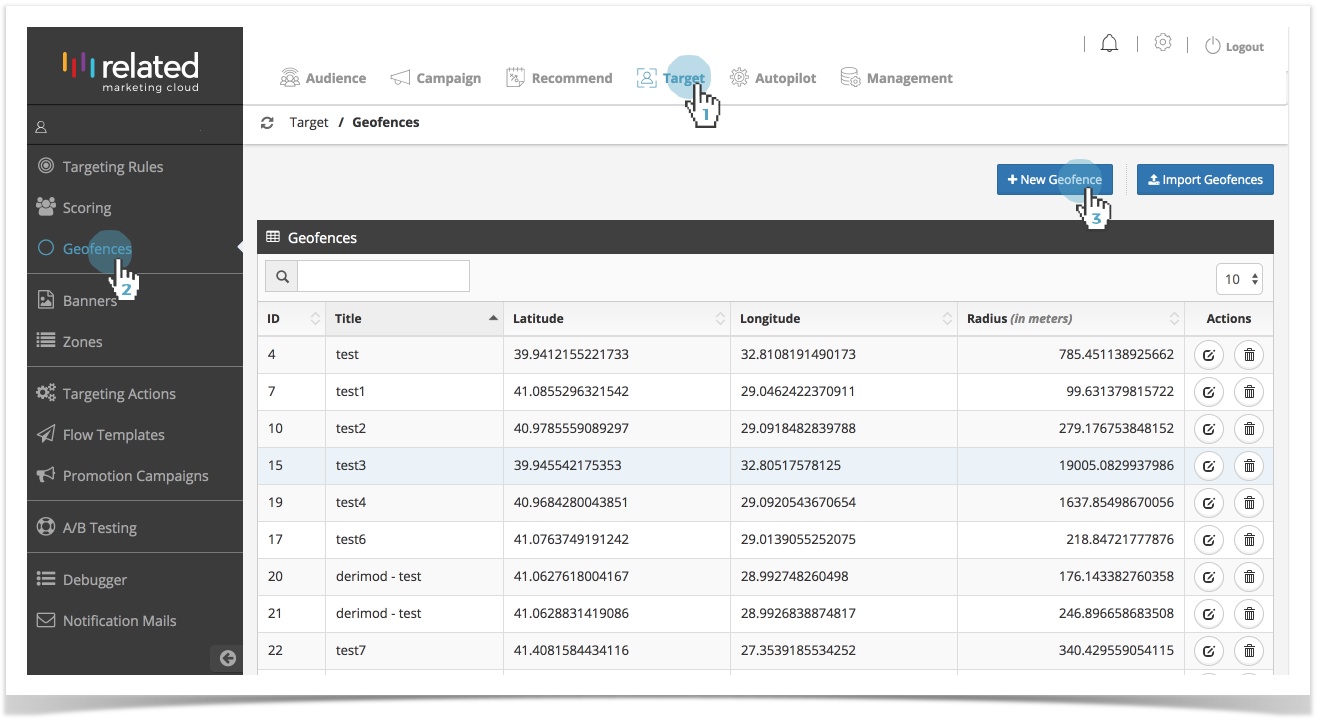
Geofence oluşturma ekranına; Target > Geofences > New Geofence seçerek ulaşabilirsiniz.
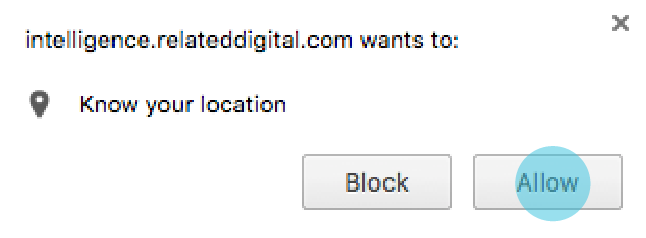
RMC Geofence ile ilk kez bir Geofence alanı tanımlarken, lokasyon bilginizi kullanmak üzere aşağıda gördüğünüz gibi bir pop-up uyarısıyla karşılaşabilirsiniz. Allow butonuna tıklayarak RMC ile lokasyon bilginizi paylaşabilirsiniz.
In the Geofences management panel, you can view and search your previously created Geofences as well as create and import more Geofences.
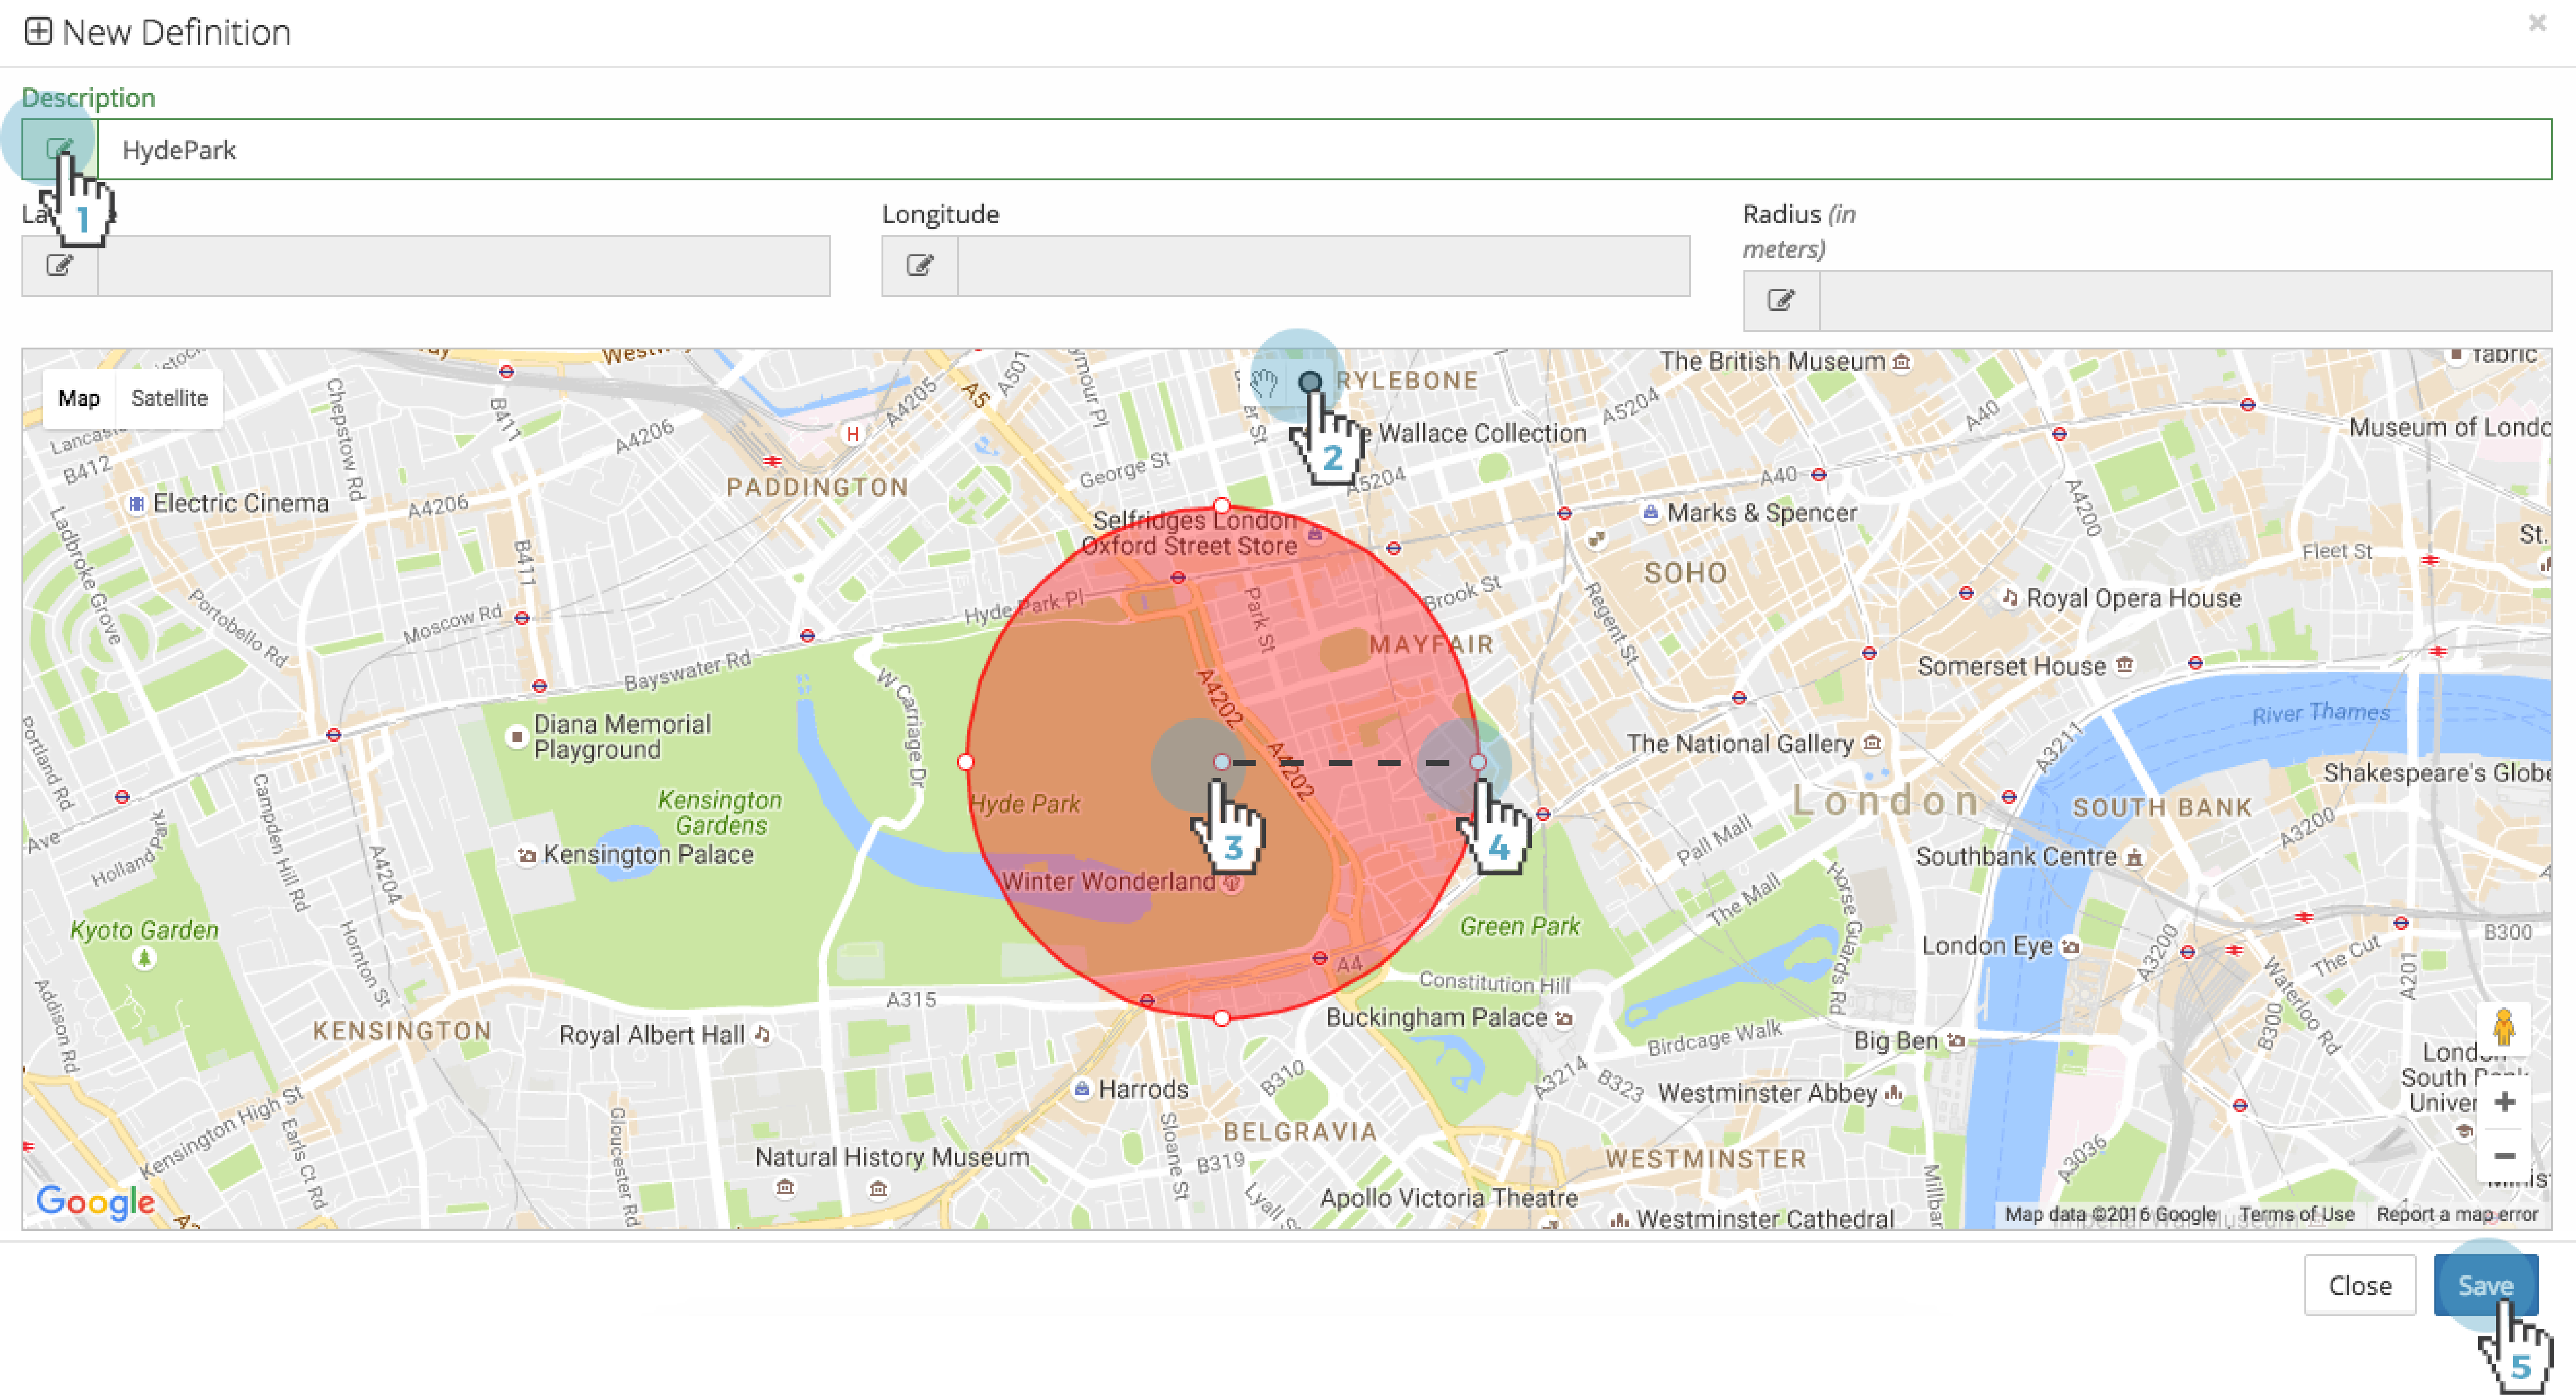
2. Enter a Description for the new Geofence, click the Geofence icon located on the map, choose the location you would like to target, drag pointer to determine the Radius and click Save.
Import Geofences
You can also create Geofences by uploading a list of Geofences that you created outside of the RMC platform. Upload your list of Geofences via a CSV file.
Here's a breakdown of the information needed on the CSV:
| Field | Description | |
|---|---|---|
| Description | The name of the location | MANDATORY |
| Latitude and Longitude | The geographic coordinates for the geofence, formatted as decimal degrees. | MANDATORY |
| Radius | The geofence's radius in meters. | MANDATORY |
Once you have successfully uploaded your Geofences, you can select New Targeting Action to Create your Geofencing Campaign.


