Creating a Test List Anchor create create
| create | |
| create |
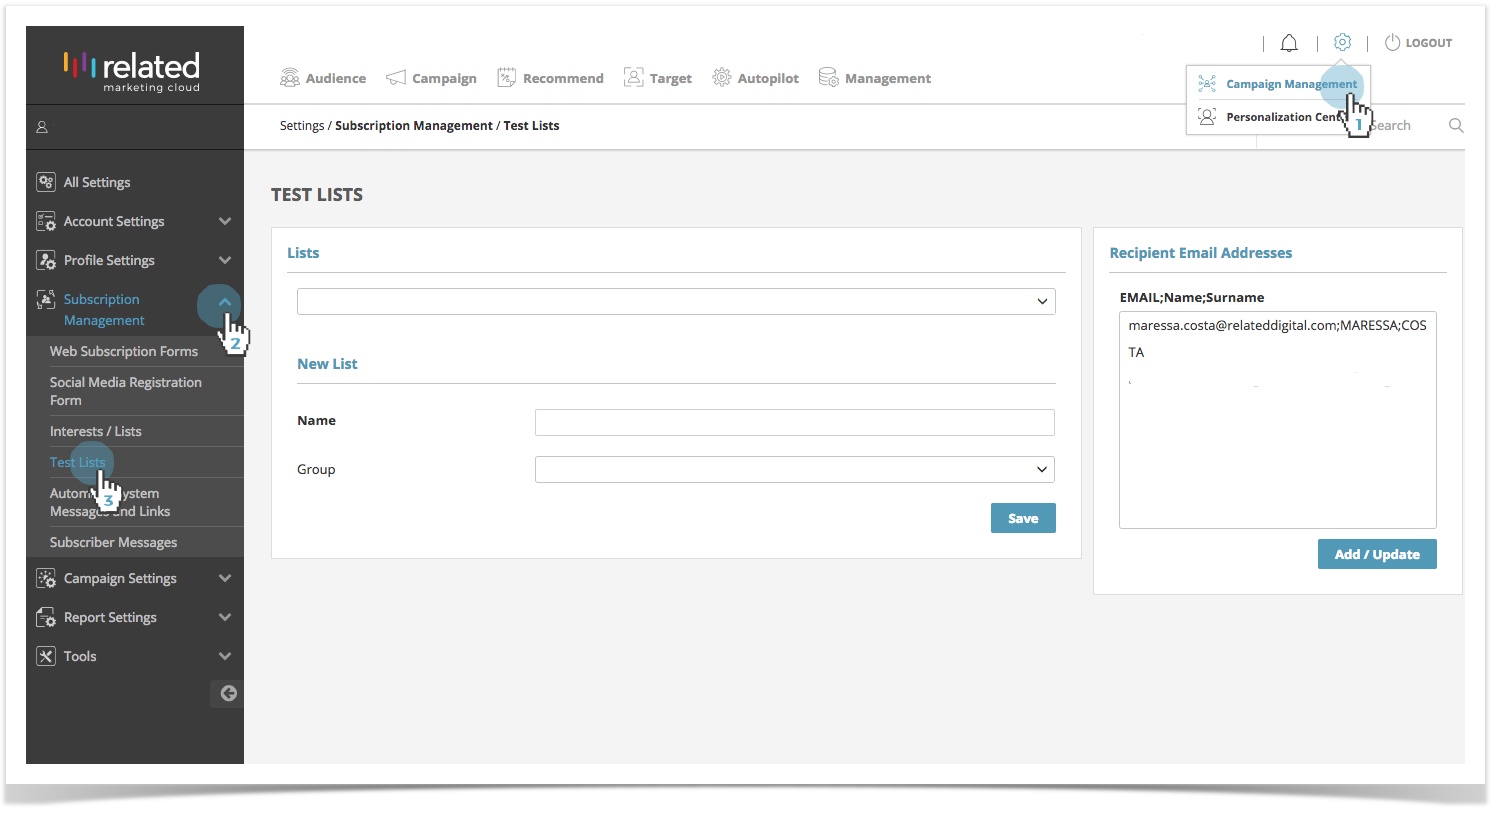
To create a test list:
- Go to Settings, select Campaign Management.
- Select Subscription Management.
- Click on Test Lists.
| Info |
|---|
Once you setup a Test List, you can utilise it to test any of your campaign channels. |
| Note |
|---|
You can also view, edit and add your Test Lists from the Campaign Management Panel screen. |
Sending a Web Push Campaign to a Test List
| Anchor | ||||
|---|---|---|---|---|
|
To send a test campaign:
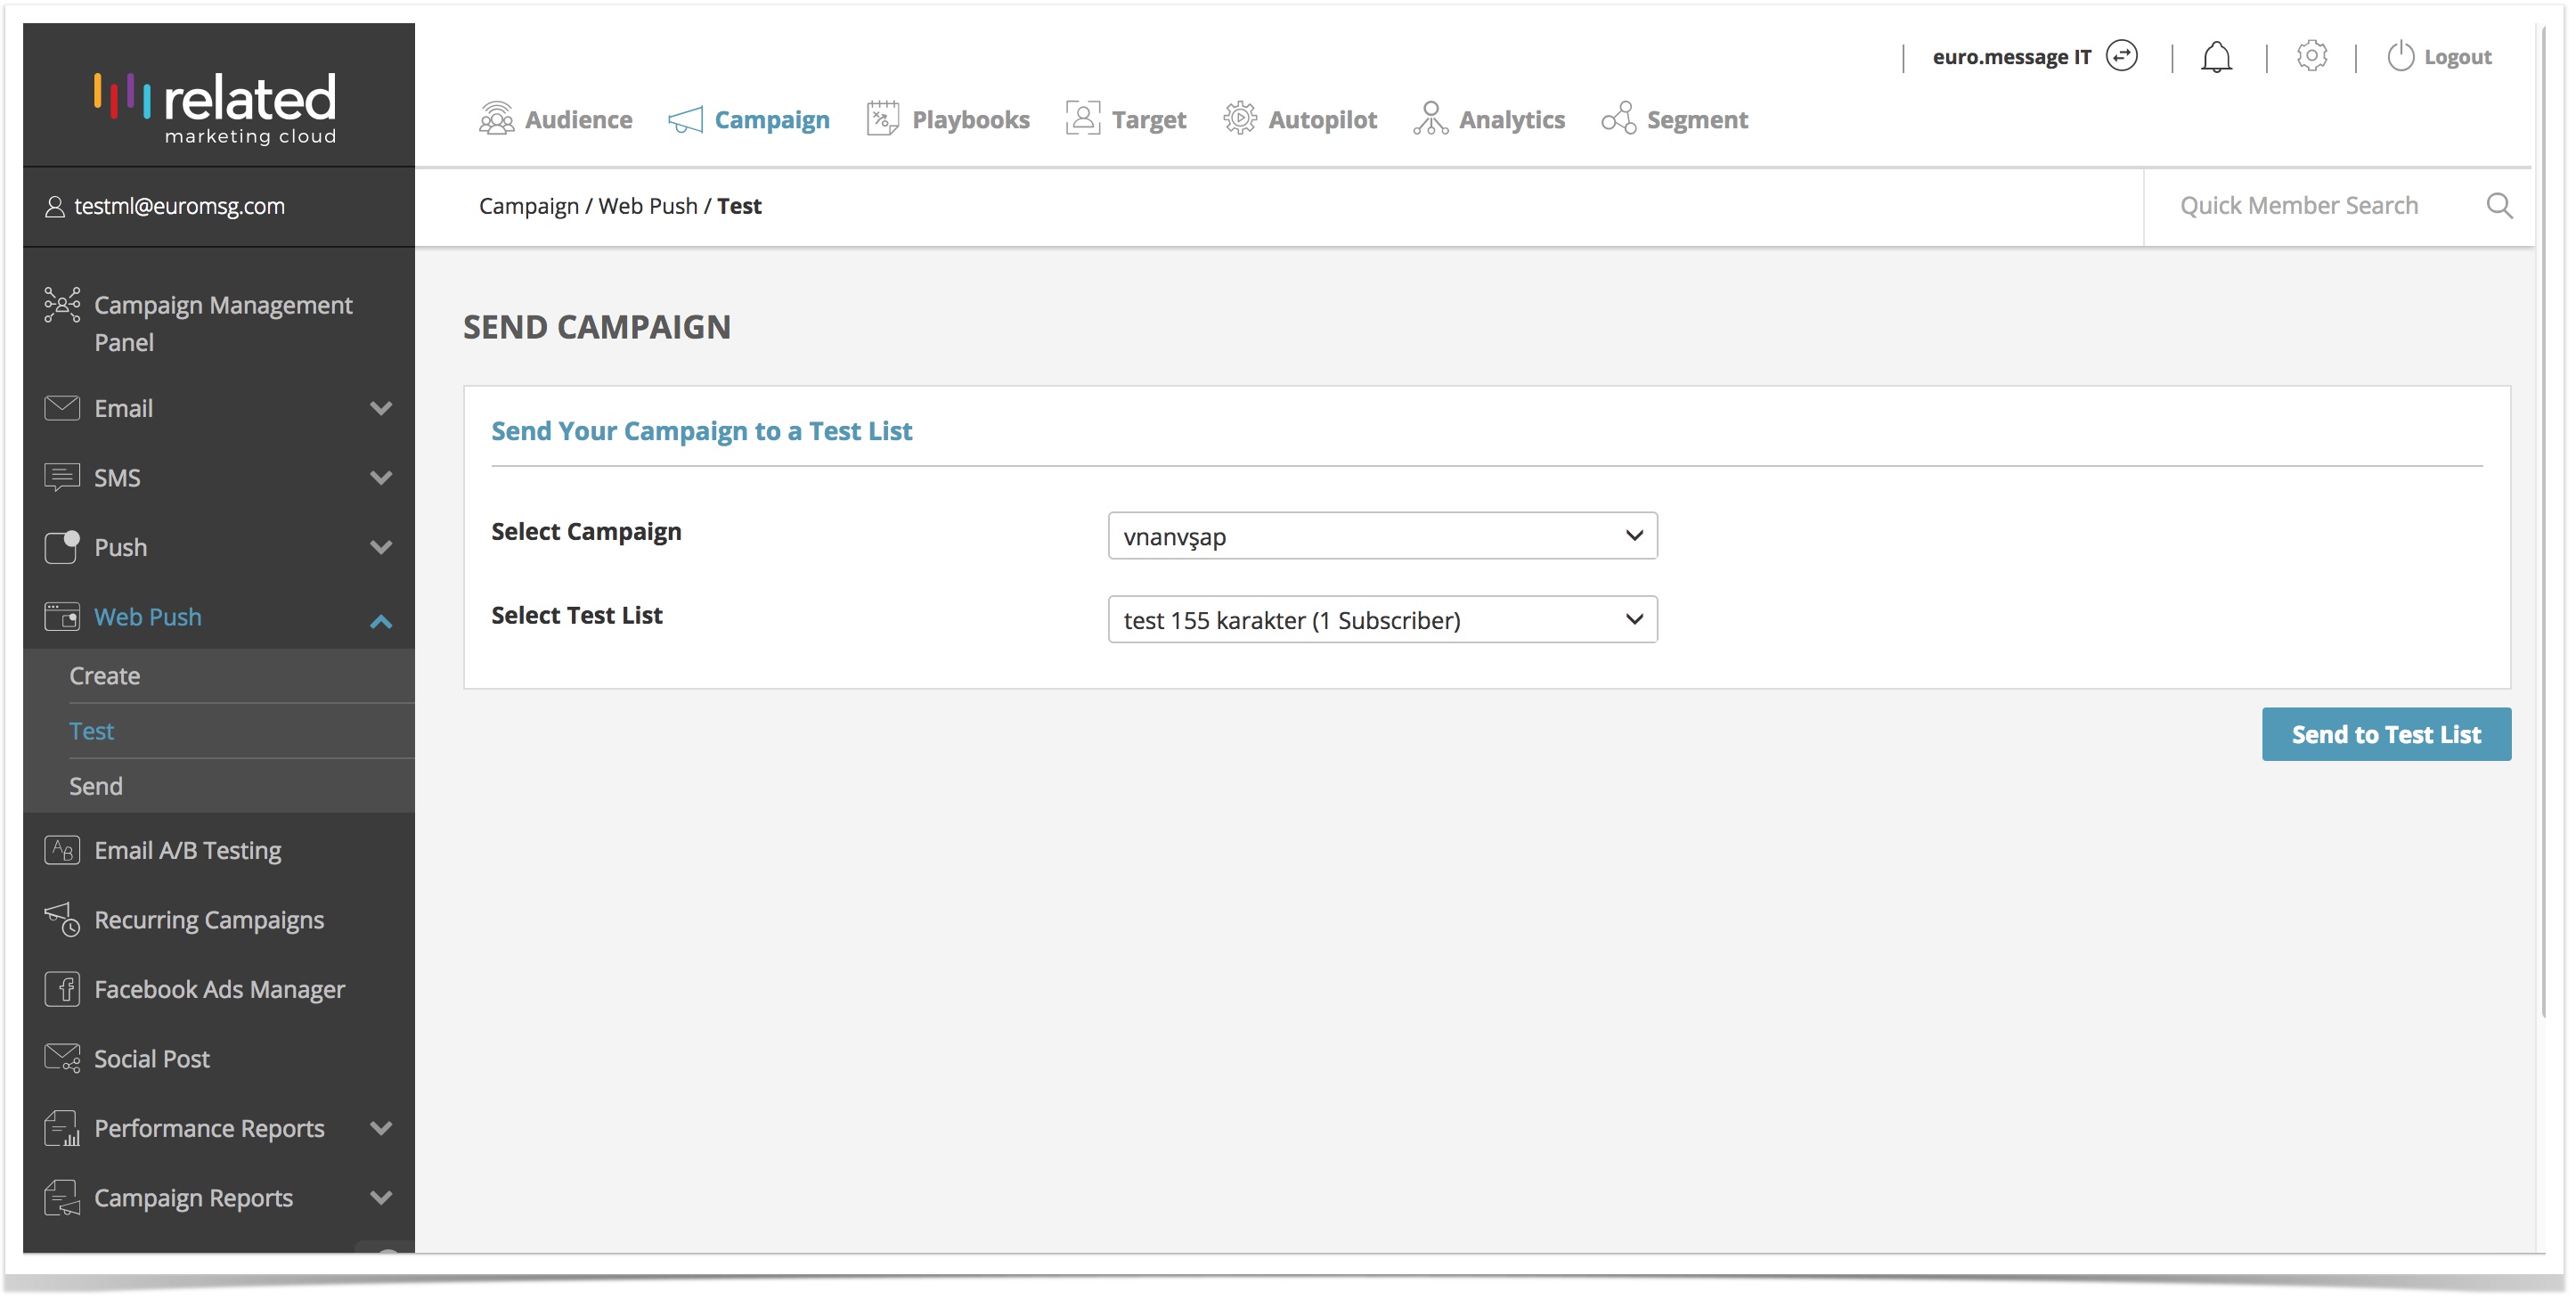
- Go to Campaign, select Web Push, click on Test.
OR - Select your campaign to test from the Draft campaigns in the Campaign Management Panel.
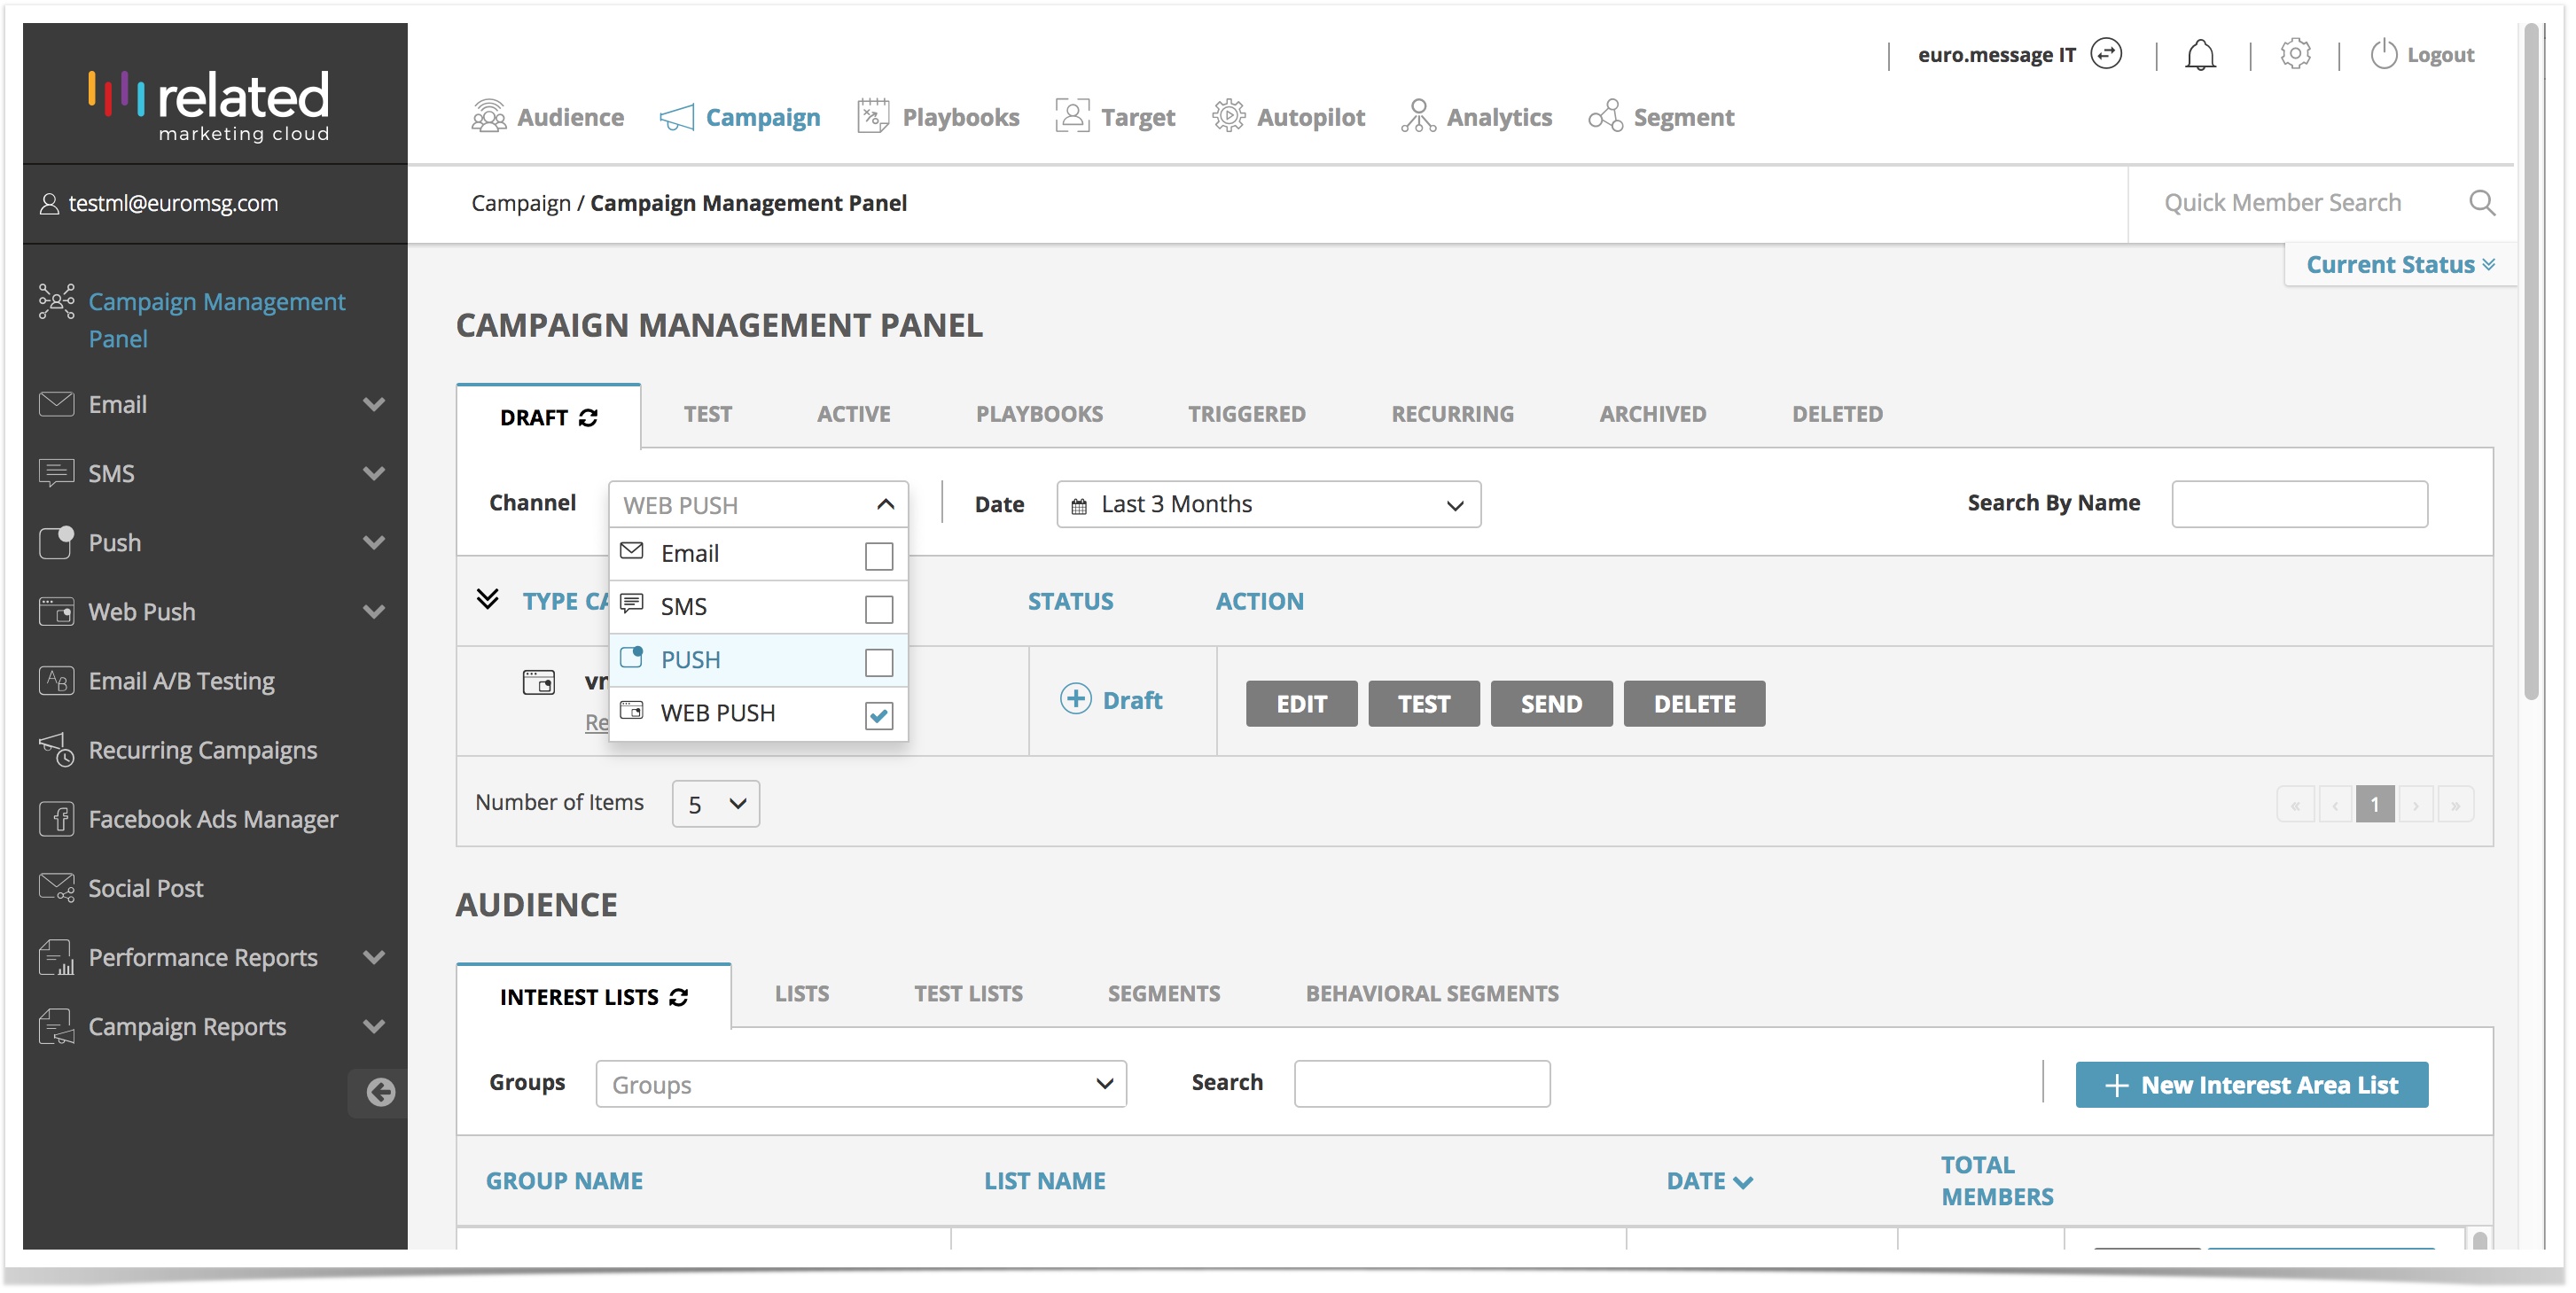
You will redirected to the Web Push Test screen, where you can:
- Select a Web Push Campaign from the drop down list.
- Select Test List from the drop down and click Send to List to start the test.
Viewing the Results of your Test Campaign Anchor view view
| view | |
| view |
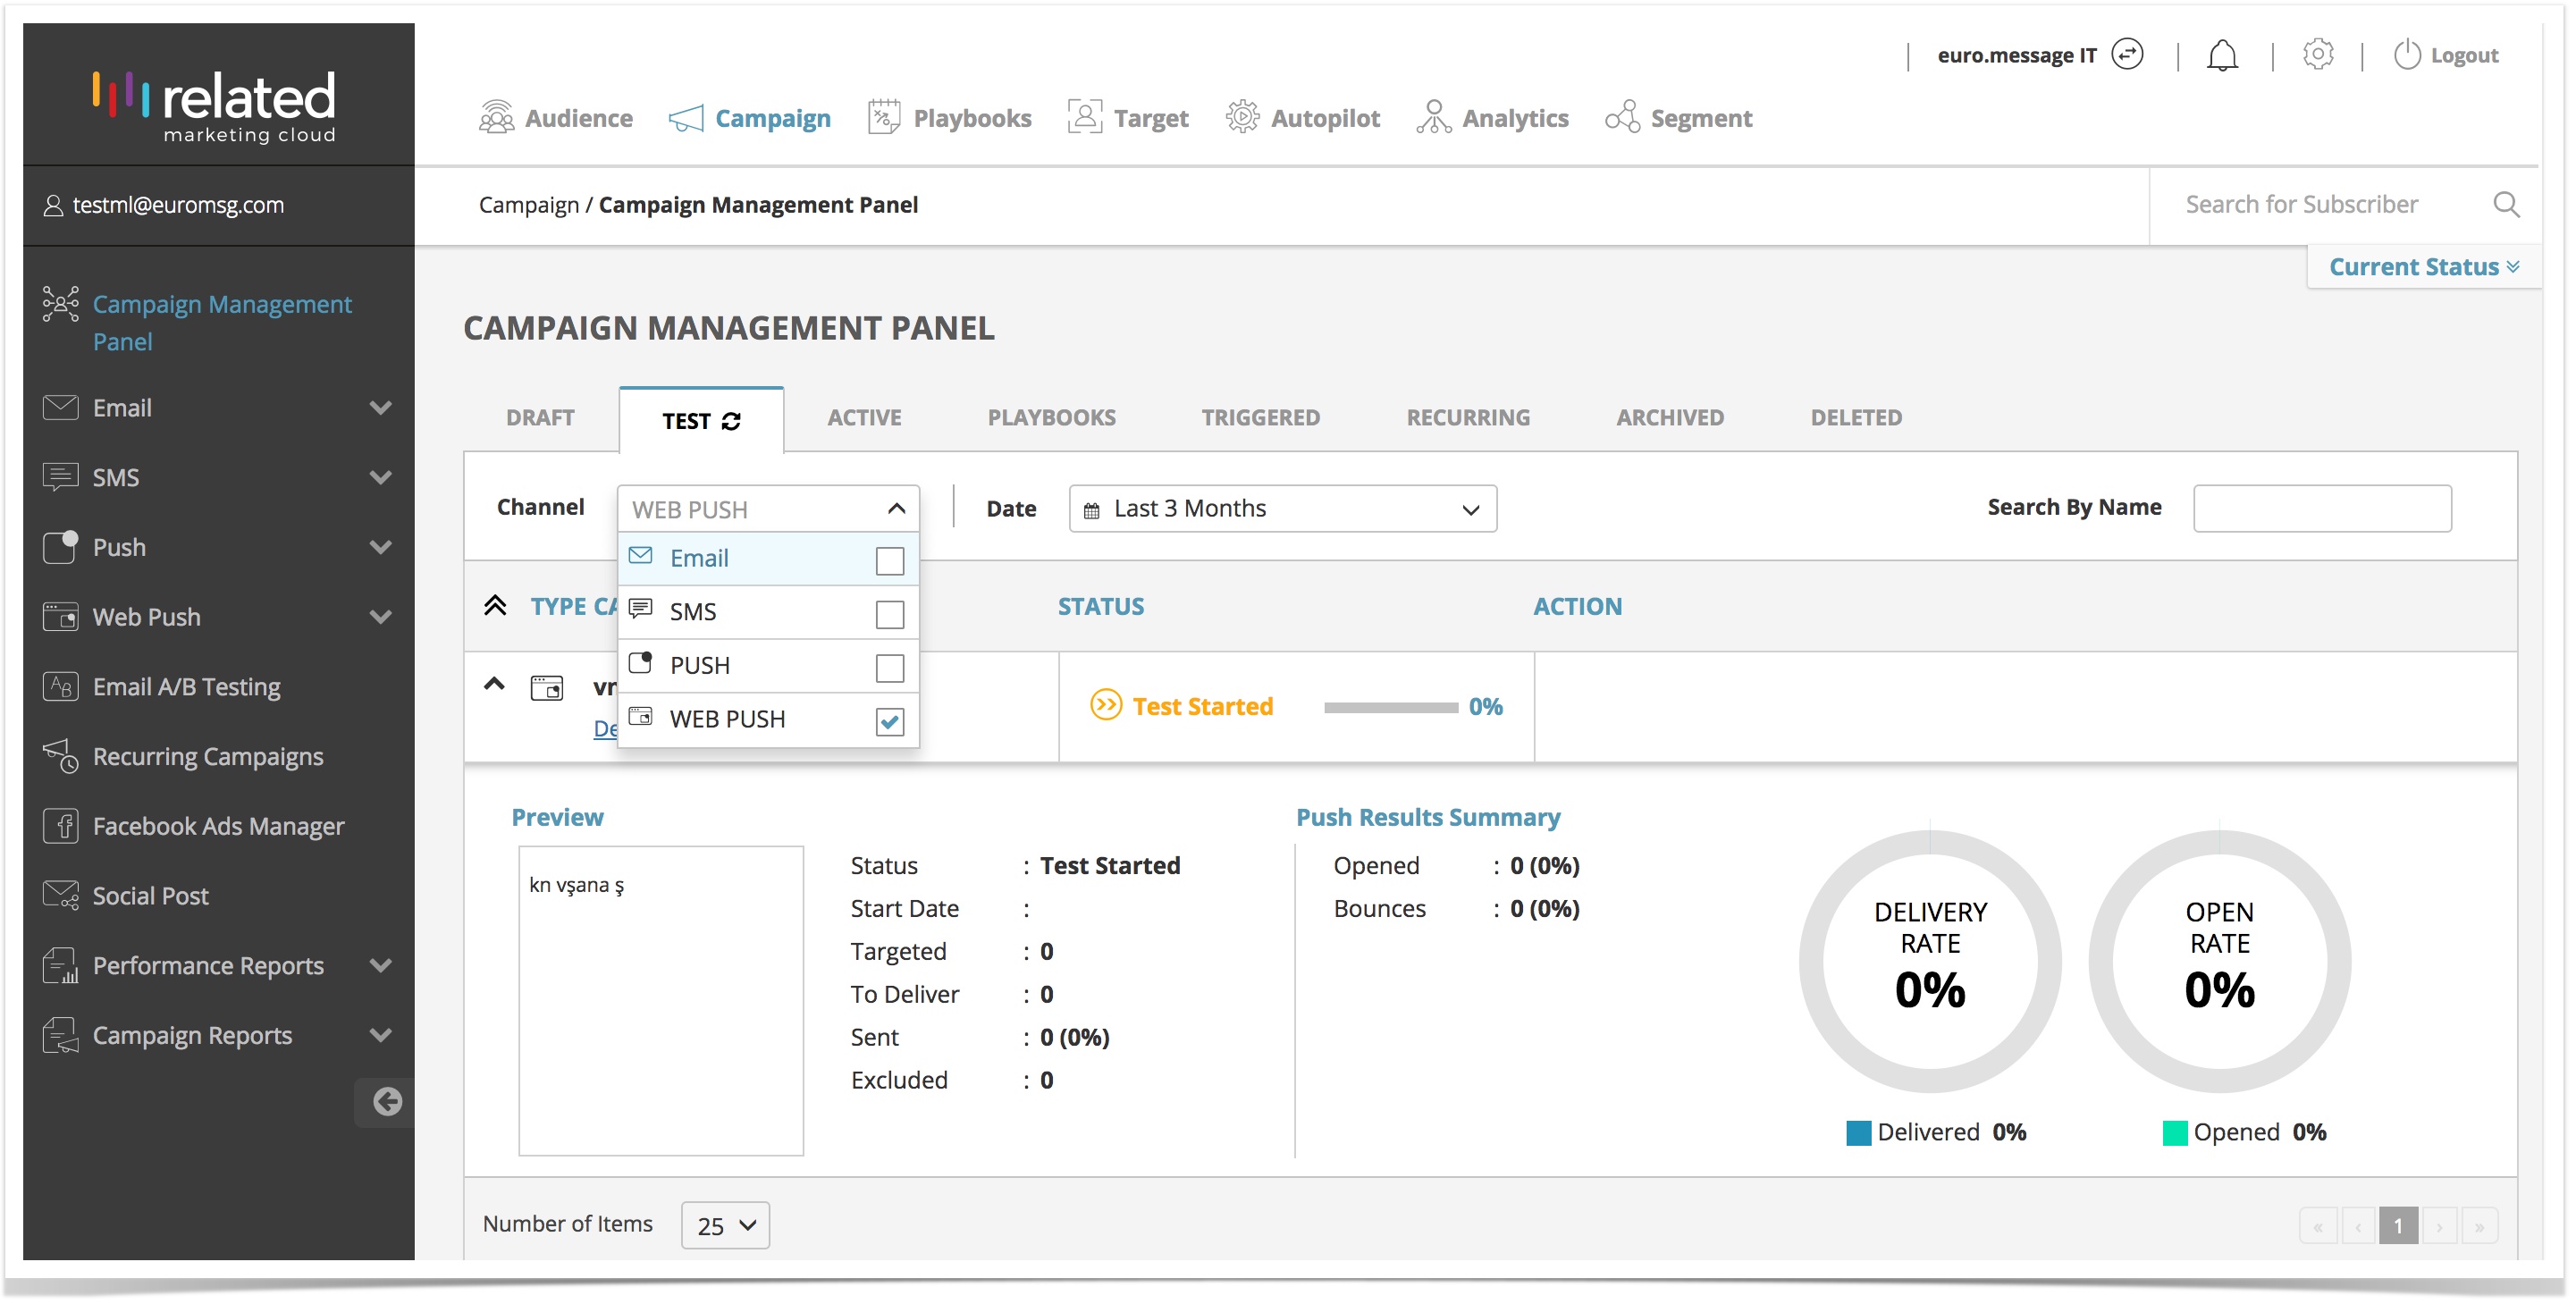
To view the results of your test campaigns:
- Go to Campaign > Campaign Management Panel.
- Click the Test tab and filter your results by channel to view Web Push campaigns.
| Info | ||
|---|---|---|
| ||
Next Steps: |
Parent Topic: Web Push