/
Web Push - Test
Web Push - Test
- Melih Ayhan (Unlicensed)
Owned by Melih Ayhan (Unlicensed)
Creating a Test List
To create a test list:
- Go to Settings, select Campaign Management.
- Select Subscription Management.
- Click on Test Lists.
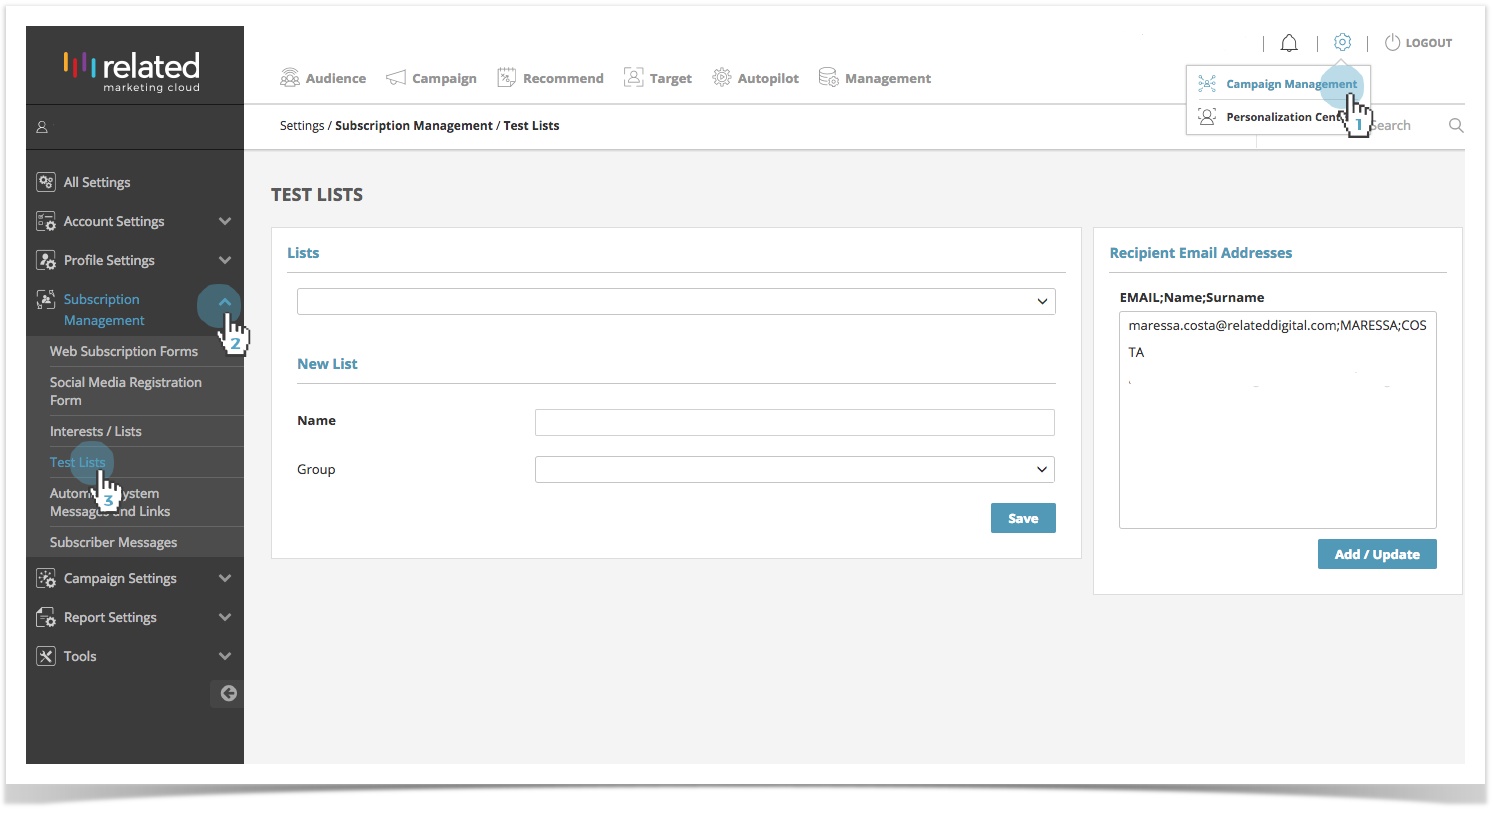
Once you setup a Test List, you can utilise it to test any of your campaign channels.
You can also view, edit and add your Test Lists from the Campaign Management Panel screen.
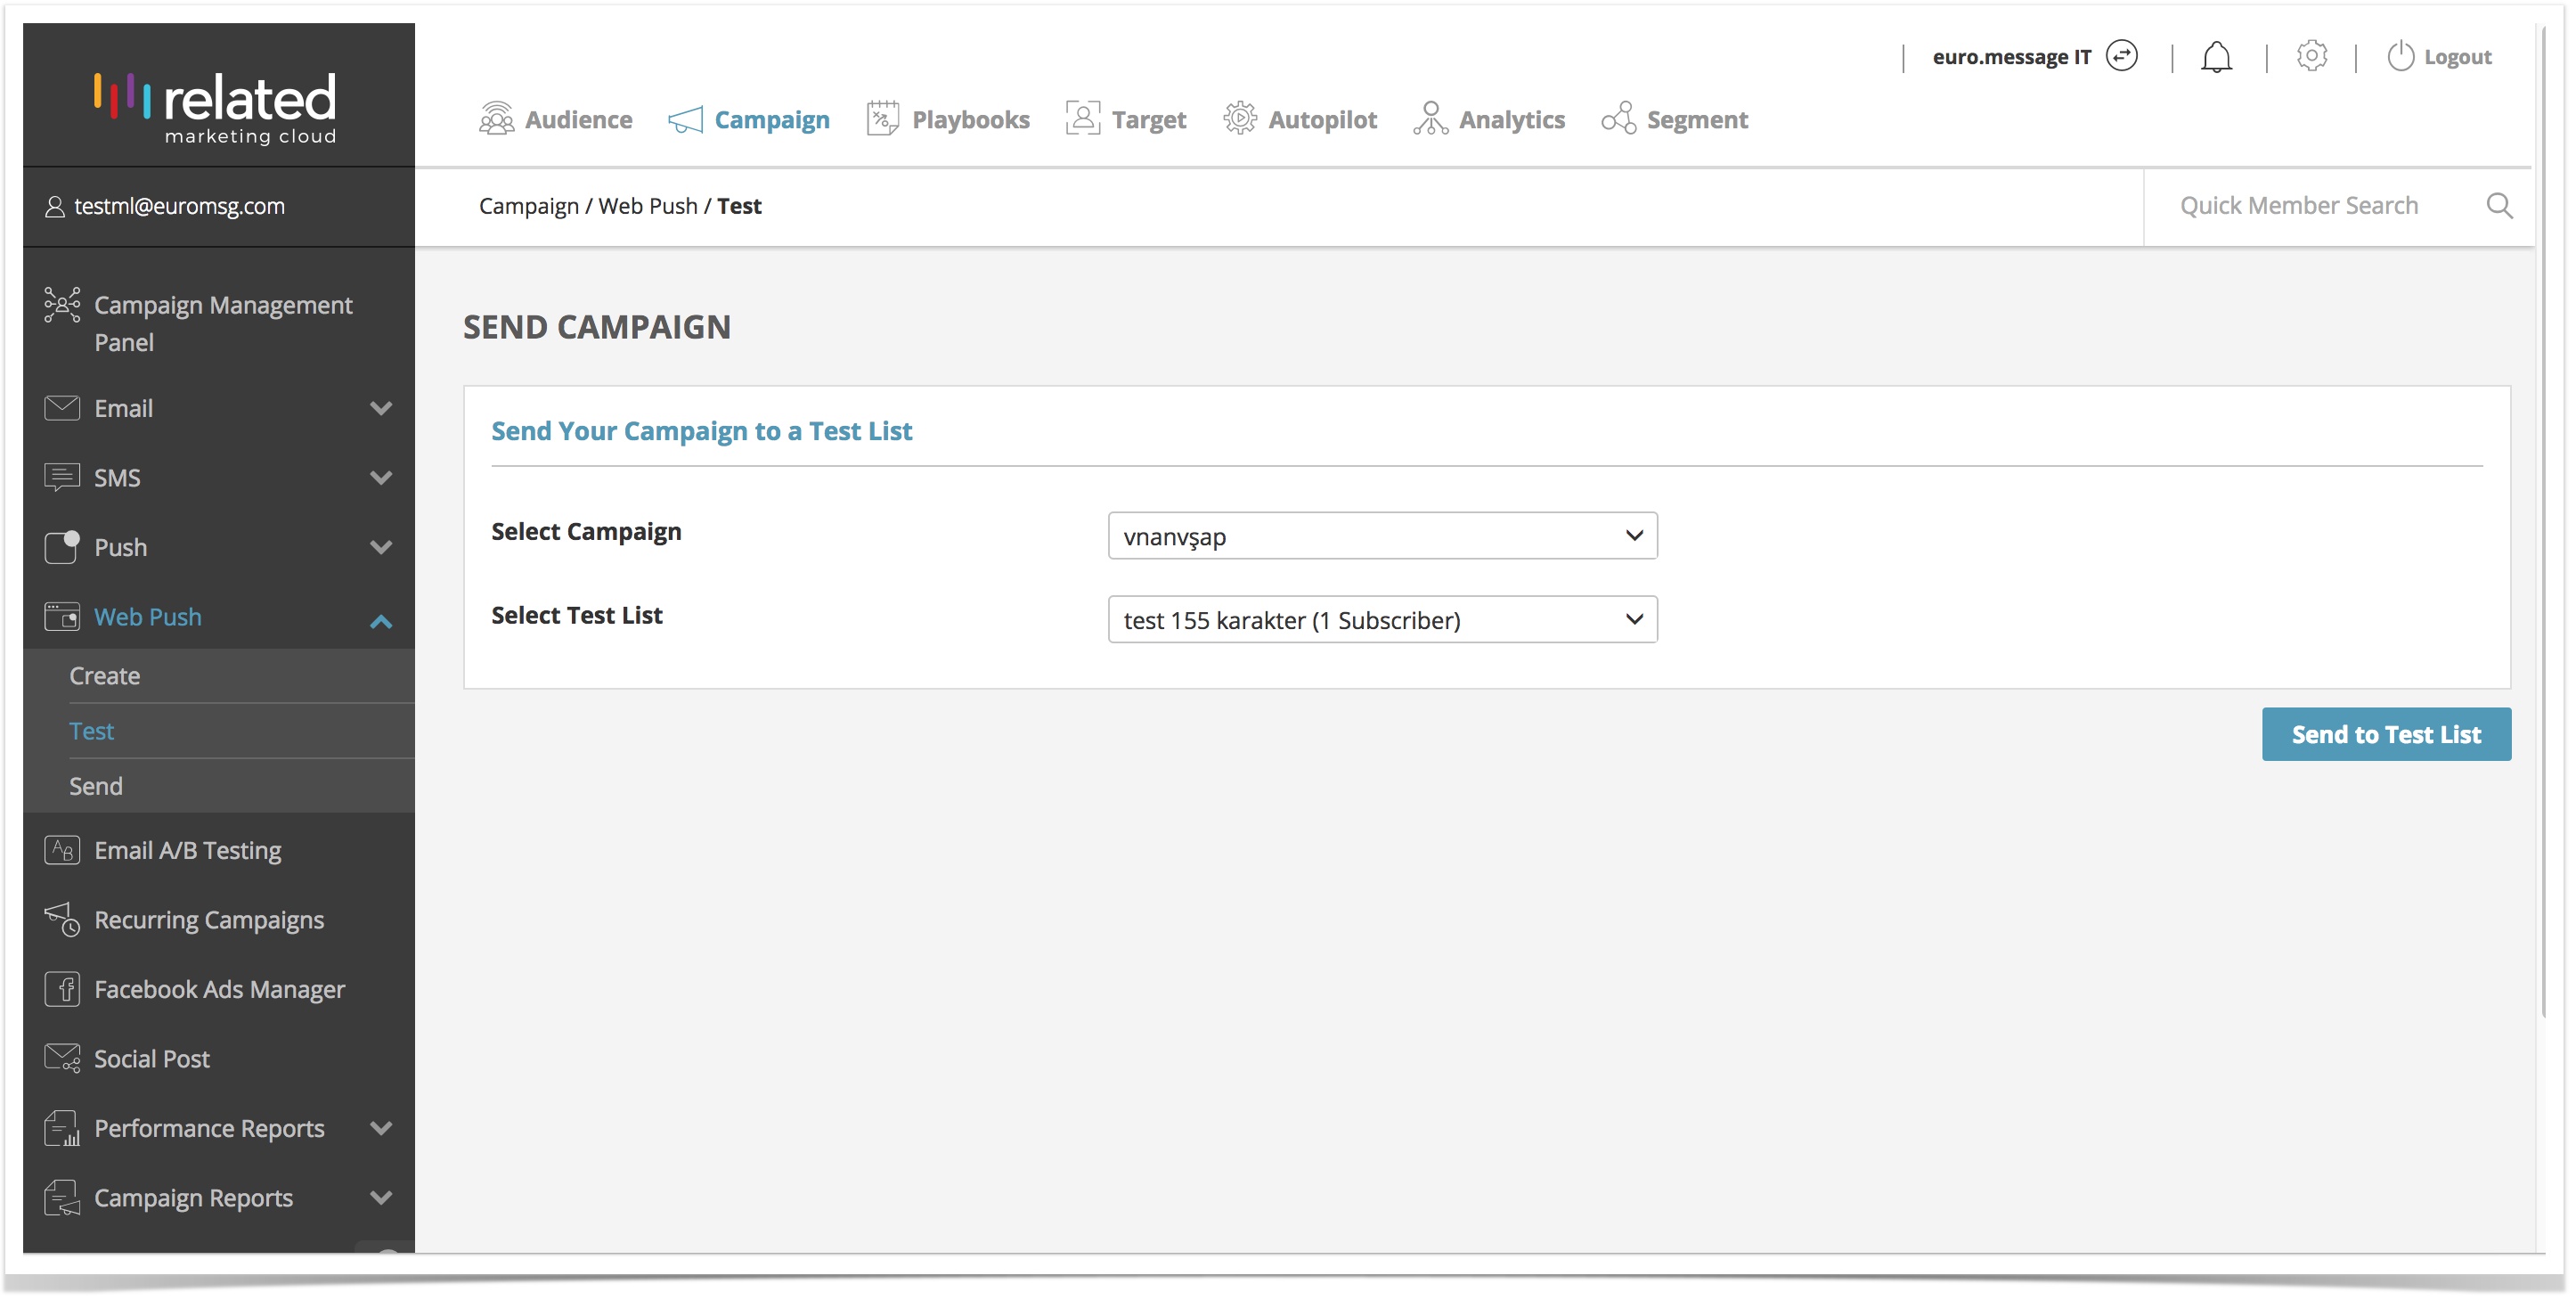
Sending a Web Push Campaign to a Test List
To send a test campaign:
- Go to Campaign, select Web Push, click on Test.
OR - Select your campaign to test from the Draft campaigns in the Campaign Management Panel.
You will redirected to the Web Push Test screen, where you can:
- Select a Web Push Campaign from the drop down list.
- Select Test List from the drop down and click Send to List to start the test.
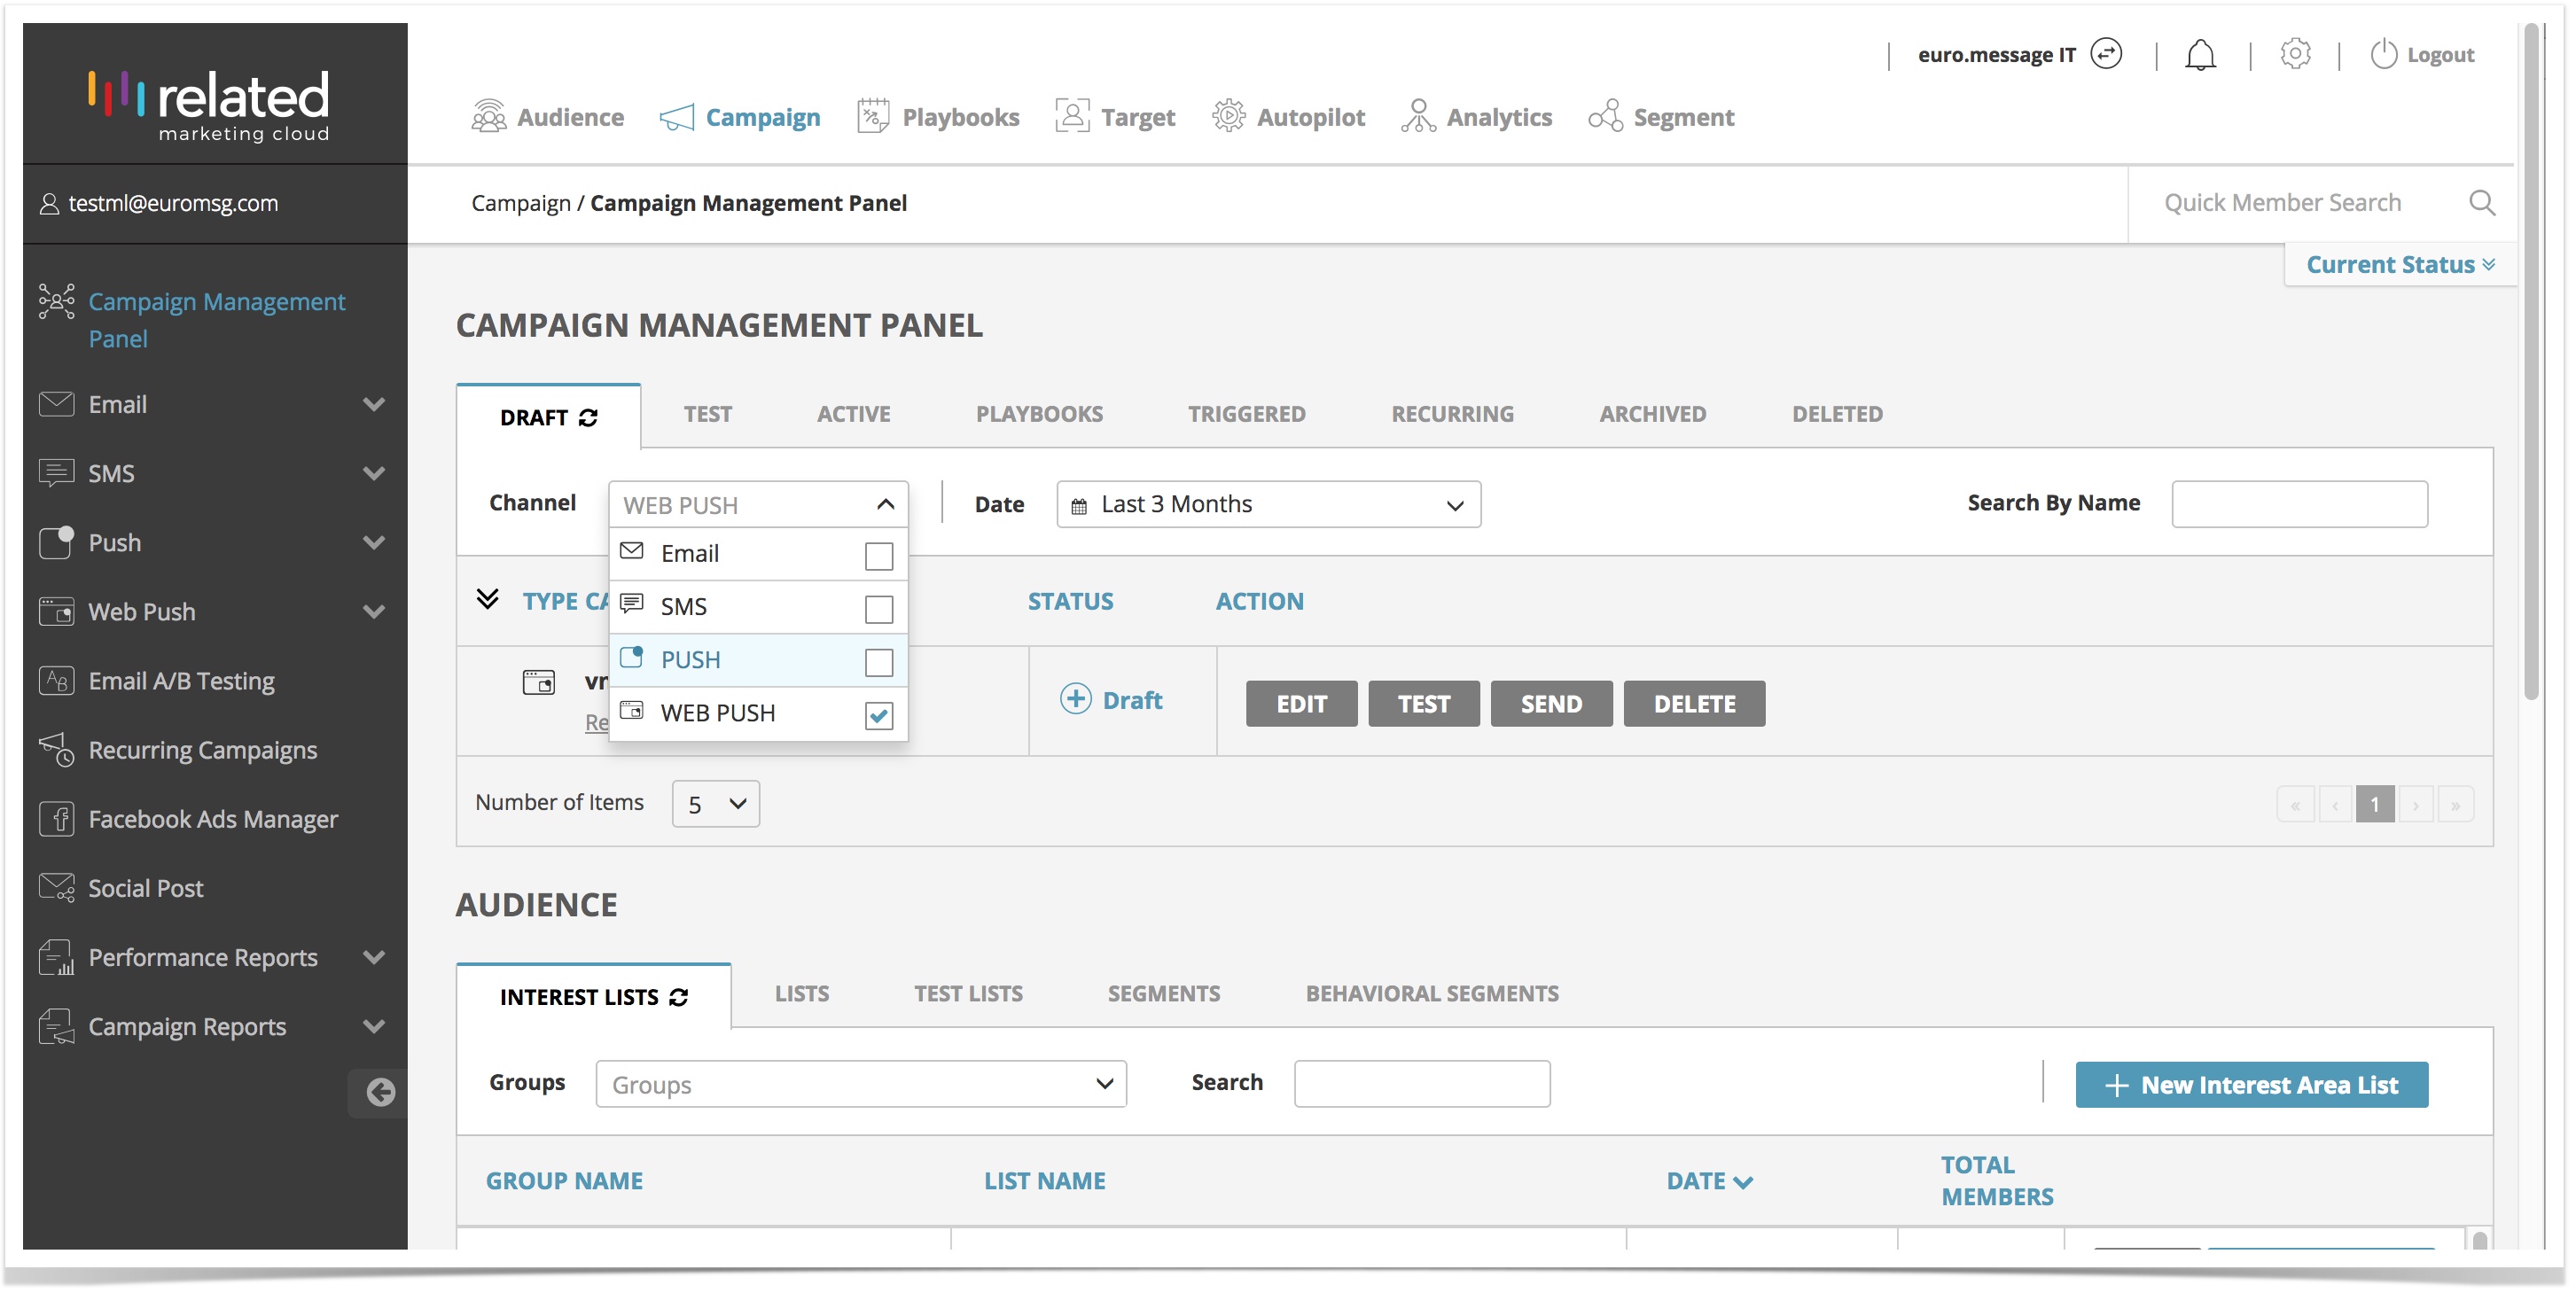
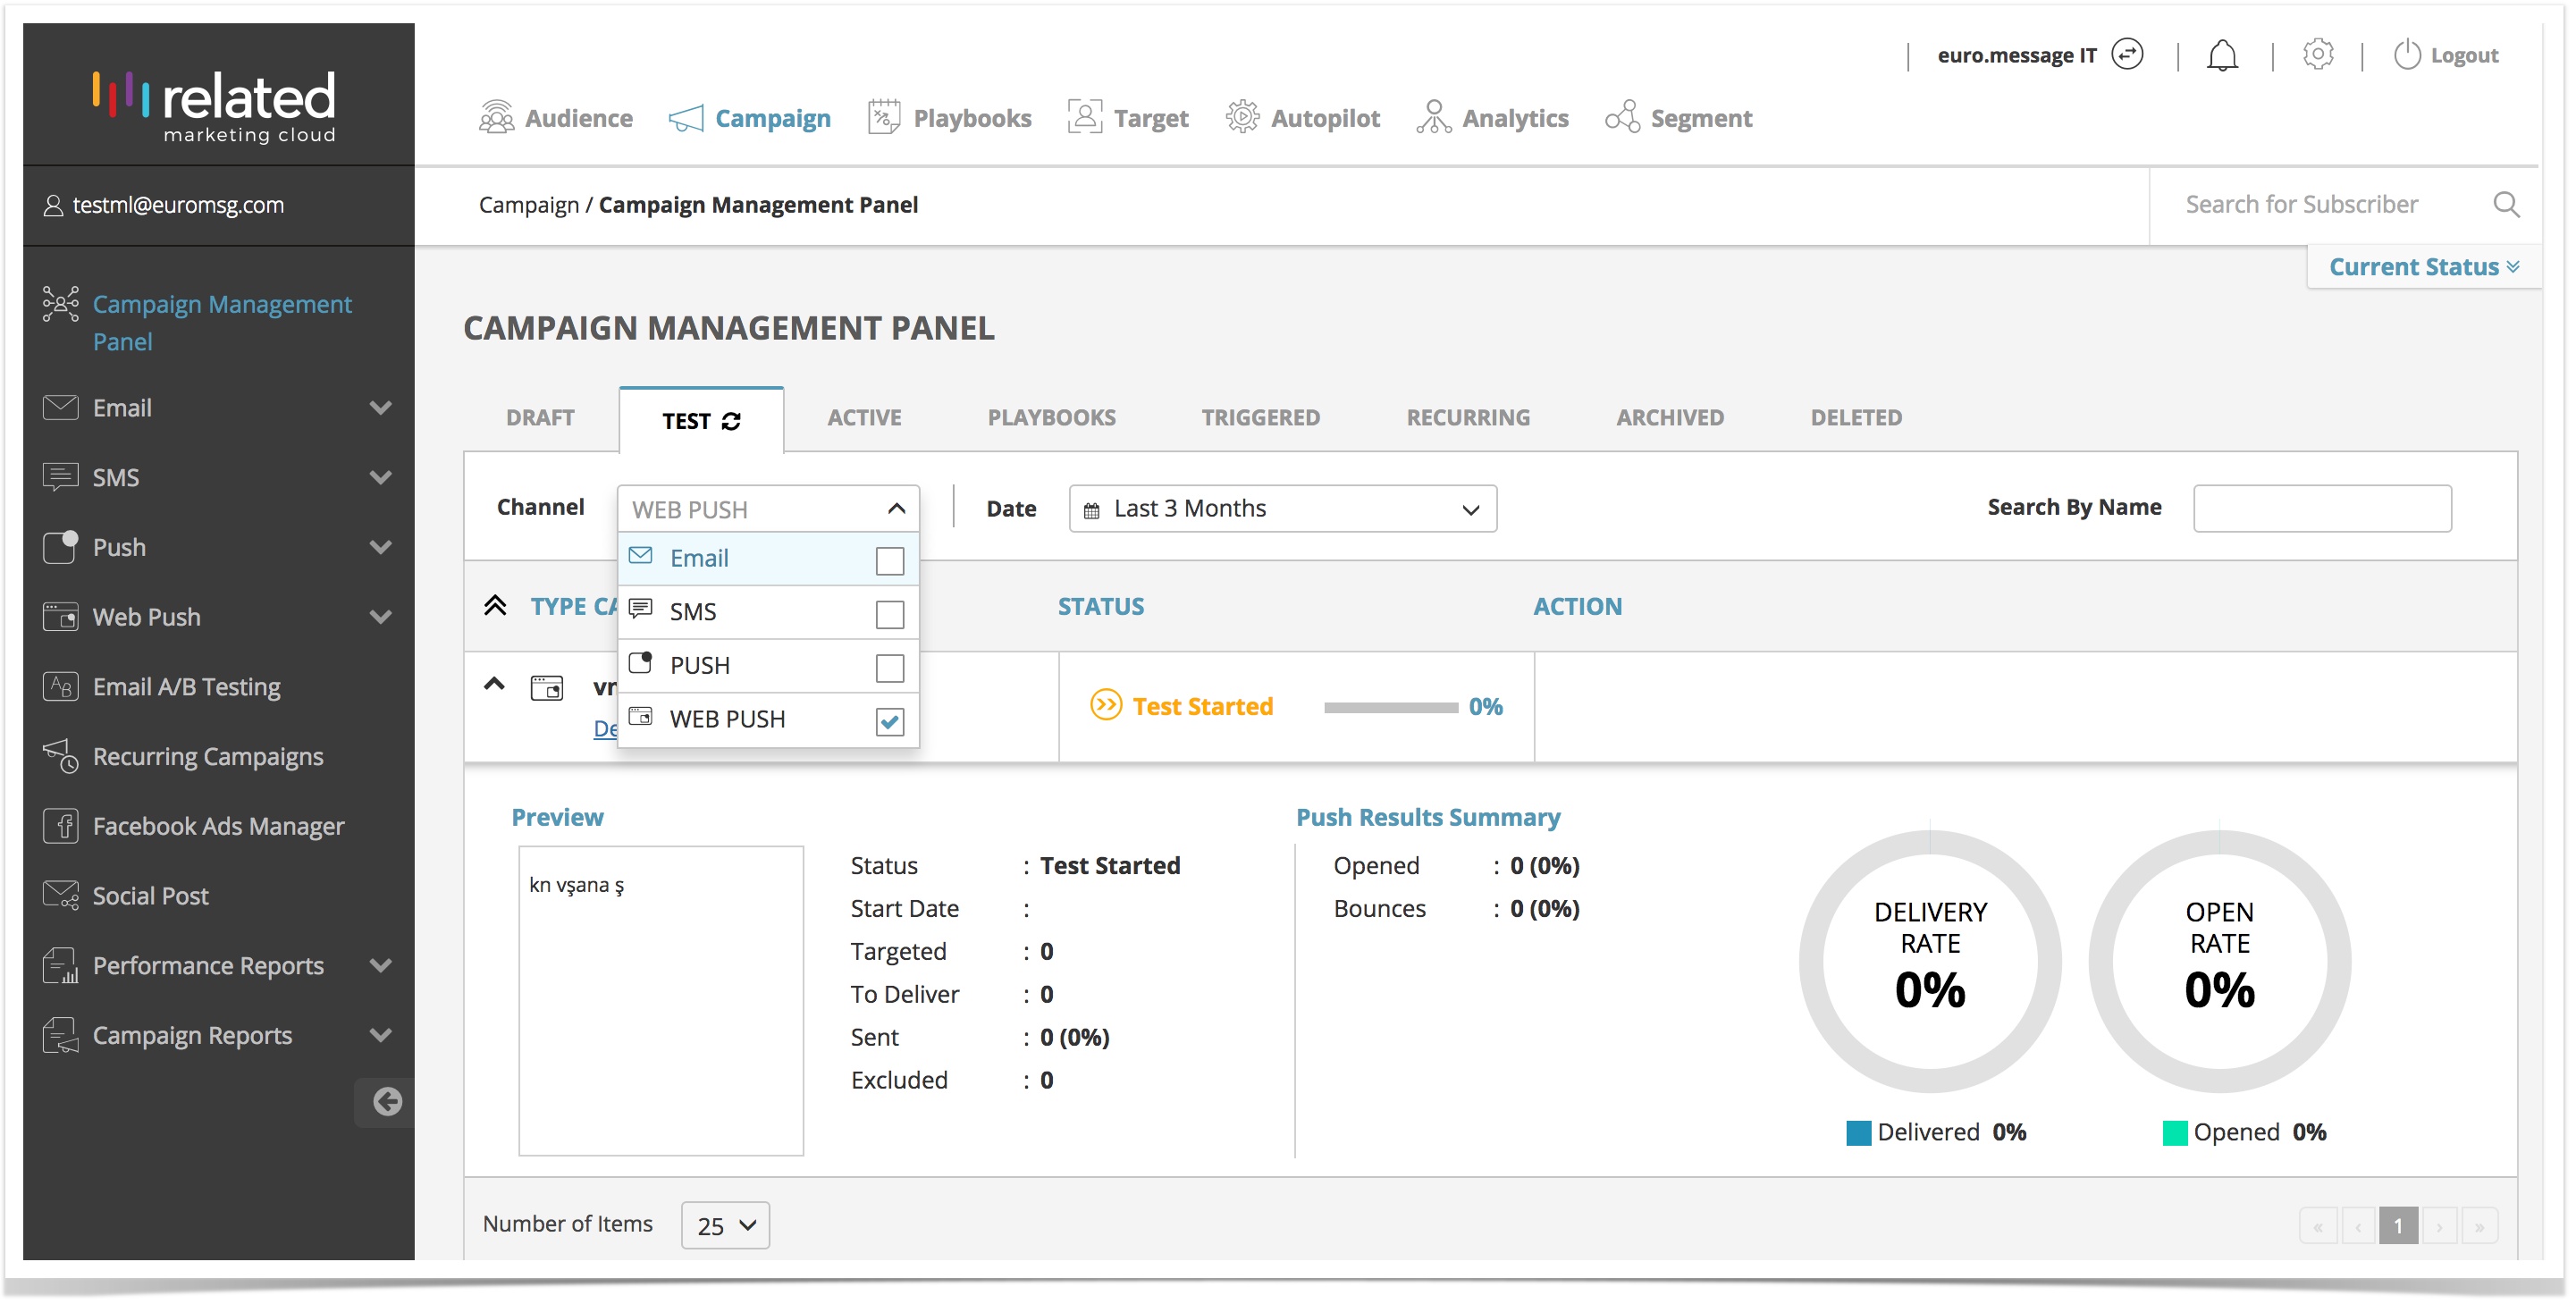
Viewing the Results of your Test Campaign
To view the results of your test campaigns:
- Go to Campaign > Campaign Management Panel.
- Click the Test tab and filter your results by channel to view Web Push campaigns.
Parent Topic: Web Push
, multiple selections available,
Related content
Push - Test
Push - Test
More like this
Email - Test
Email - Test
More like this
Web Push - Create
Web Push - Create
More like this
RMC - Web Push
RMC - Web Push
More like this
Web Push
More like this
SMS - Test
More like this
Copyright 2020 Related Digital