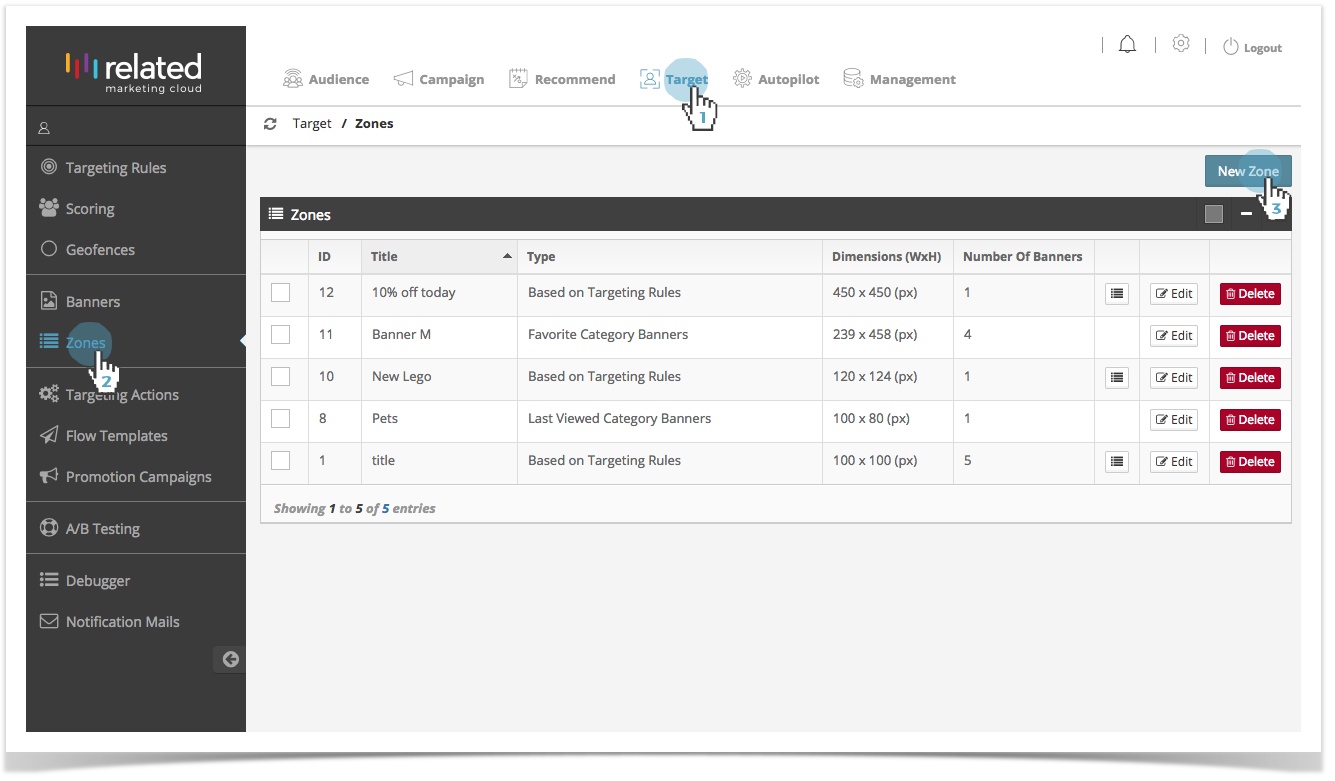
Creating a New Zone
- Click Target in the top menu bar.
- Select Zones.
- Click New Zone
Or
To copy an existing Zone, click to edit and create a similar zone.
General Information
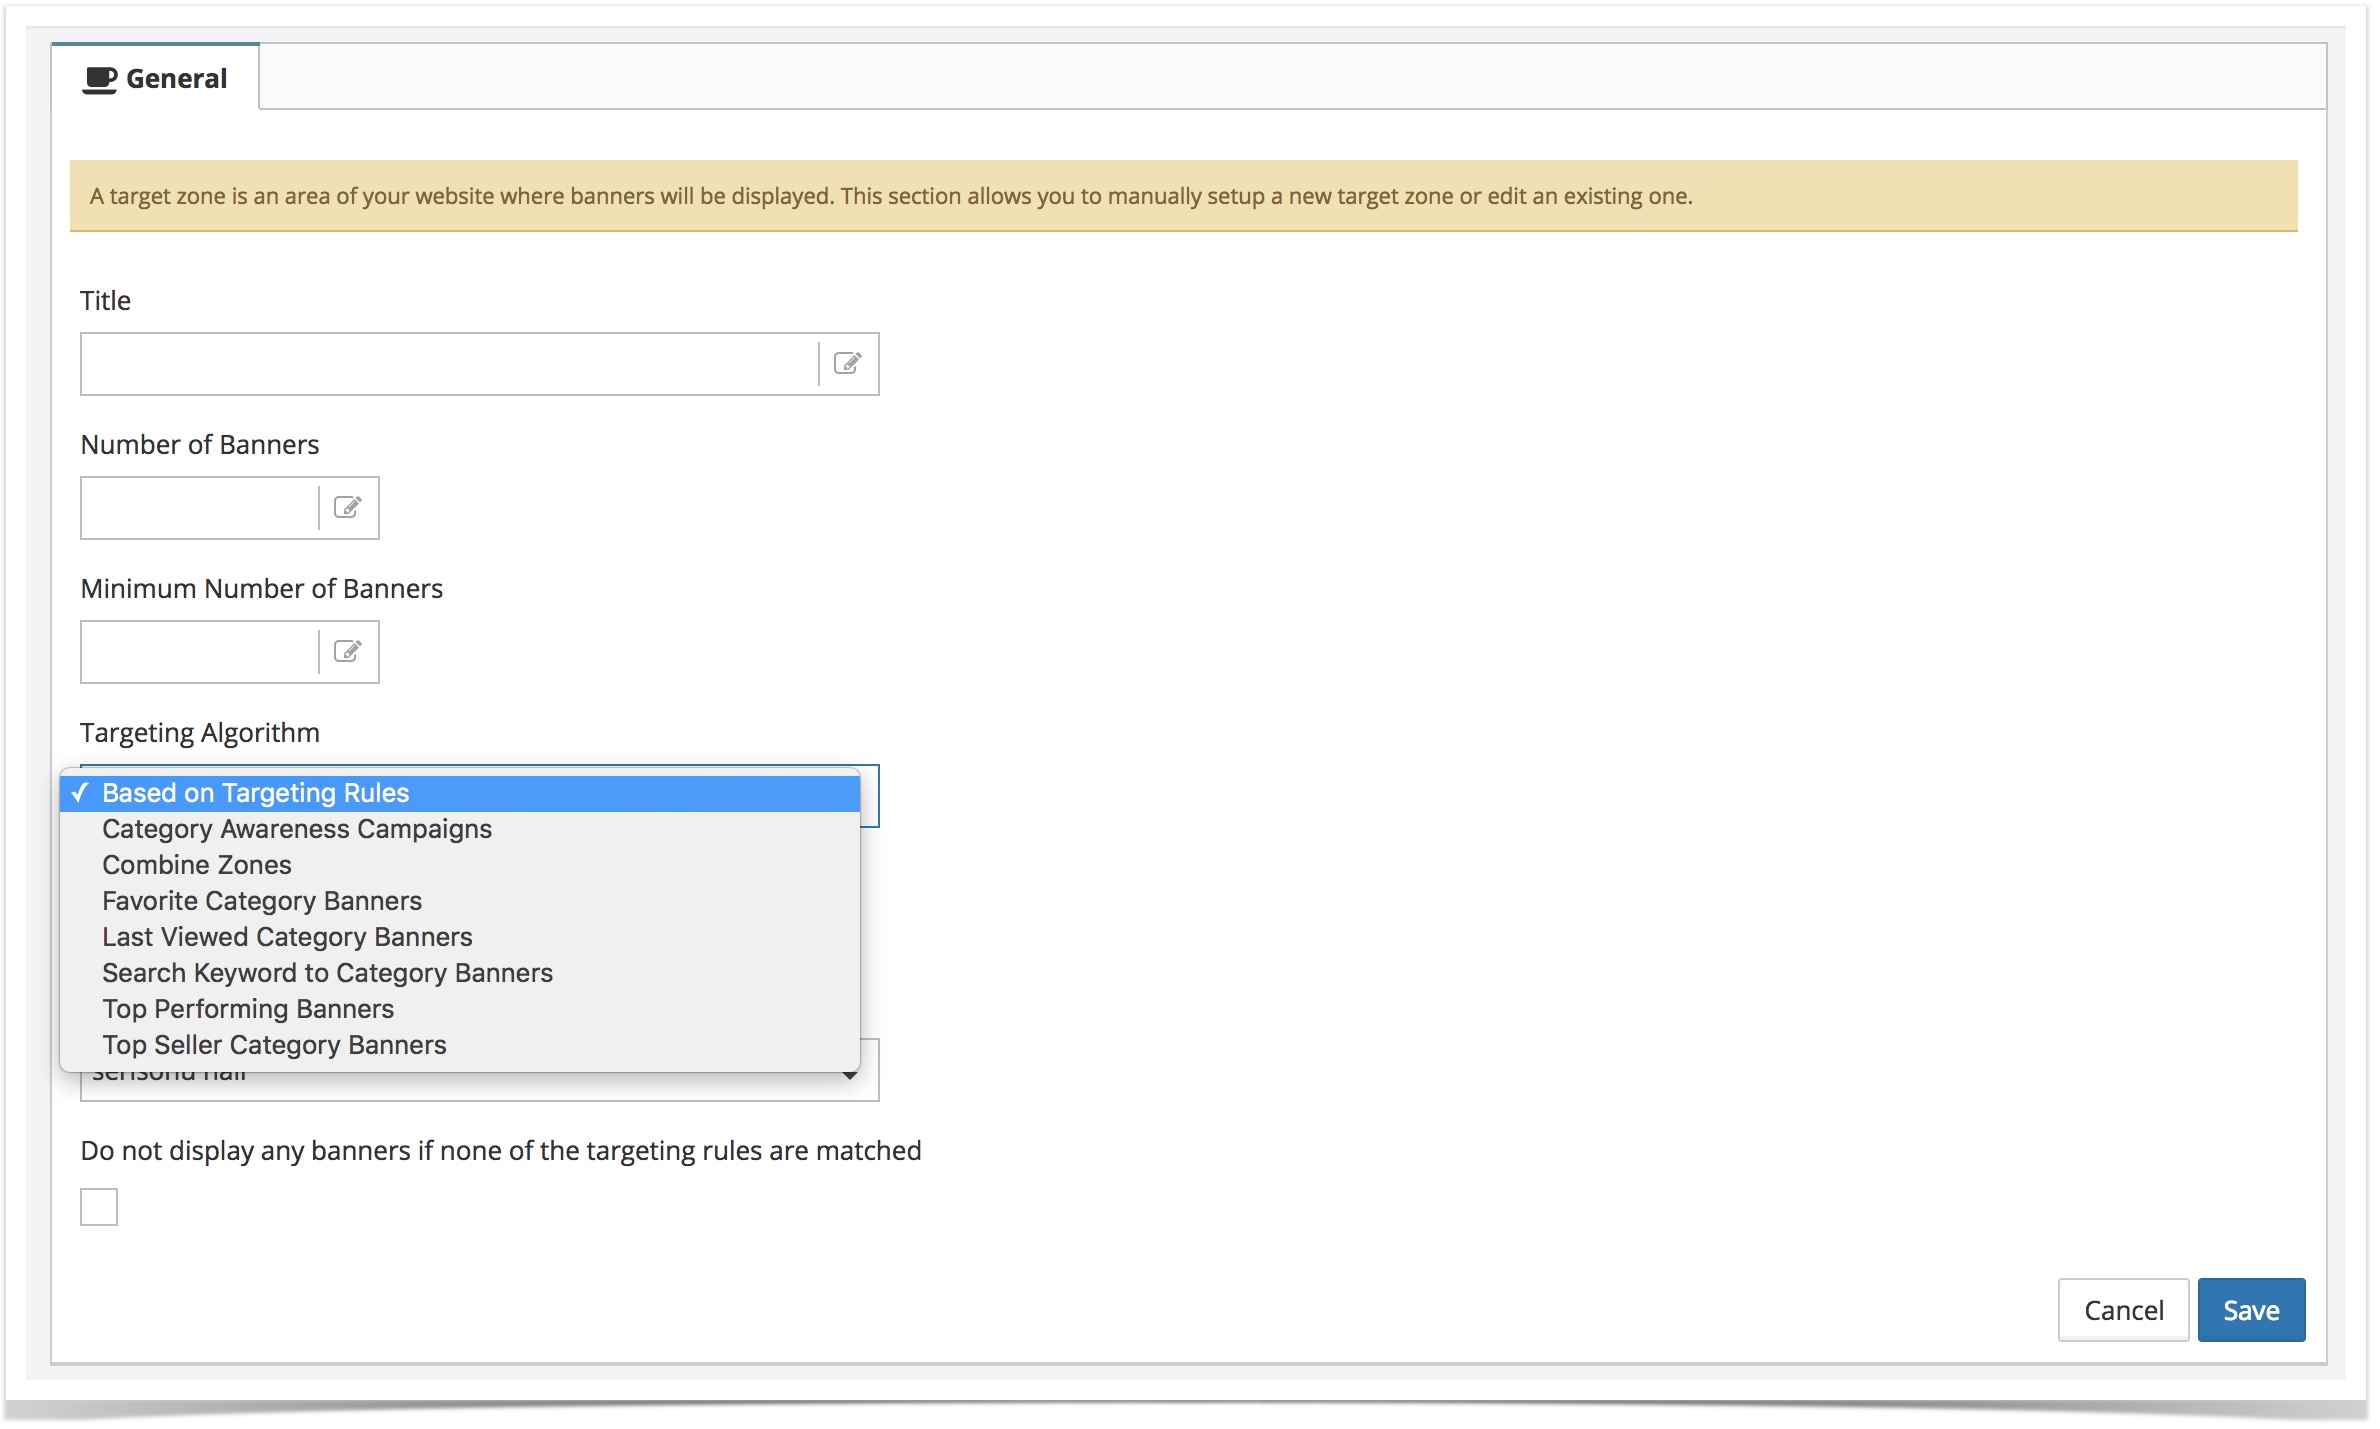
Enter the general information in the required fields to create the new zone:
- Title – The name of the zone. It is recommended that you use a name that uniquely identifies the zone, and will allow you to recognise the zone quickly and easily.
- Width (px) – The width of the zone.
- Height (px) – The height of the zone.
- Number of Banners – Total number of banners that will be displayed in this zone.
- Minimum Banner Count – Defines the minimum number of that will be displayed in the zone.
- Targeting Algorithm – Target engine uses the following algorithms provided to match banners to shoppers who will find it most relevant in their current context:
- Display banners based on Targeting Rules:
- Category Awareness:
- Combine Zones:
- Top Seller Category Banner:
- Top Performing Banners:
- Search Keyword to Category Banners:
- Last Viewed Category Banners:
- Favorite Category Banners:
- Display banners based on Targeting Rules:
- Default Banner –
- Serve If Rule Matches –
Save Changes
Once you have filled out all the fields, click on Save to create the new zone. You will be returned to the Target > Zones page, where you will be able to see your newly created zone.
Although you have now created a new zone, and you can link Rules and Banners to the new zone, no banners will be displayed on your website until you have also created the zone serving tag and inserted the tag into the website's code in the appropriate location.
Managing Existing Zones
The initial page of Zones (Target > Zones) displays a list of previously defined Zones.
To manage existing Zones, use the following basic actions:
- – opens Zone's editing interface, where you can configure the Zone.
 – deletes the Zone.
 – opens the Banner Order interface where you can manually change the display order of banners by dragging and dropping them anywhere you want. Changes will automatically be saved.
Parent Topic: Banner Management