Setup A Web Application on RMC
Go to; Cog Icon > Campaign Management > Campaign Settings > Push Applications > New Website to setup a web application.

Web Push SDK installation steps vary according to site security protocol;
- HTTP: Steps to be taken into consideration while installing Web Push SDK for http://URL websites.
- HTTPS: Steps to be taken into consideration while installing Web Push SDK for http://URL websites.

- Website Name: Your website name. HTTPHTTPS
- Website Address: Your website address www.domain.com HTTP HTTPS
- Https: It is marked when you want to setup for web sites running in HTTPS protocol.. HTTPS
- Branded Subdomain: The branded subdomain address to be redirected during opt-in process HTTP
Your site's notifications appear as a subdomain of relateddigital.com instead of your domain name. - Default Cookie: The name/key of the cookie including the member info/ID in your web site.HTTP HTTPS
- Default Title: Default Title for asking permissions and web push campaigns. HTTP HTTPS
- Default Text: Default Text for asking permissions and web push campaigns. HTTP HTTPS
- Default Icon: Default icon for asking permissions and web push campaigns. HTTP HTTPS
Maximum sizes are 192x192 px.
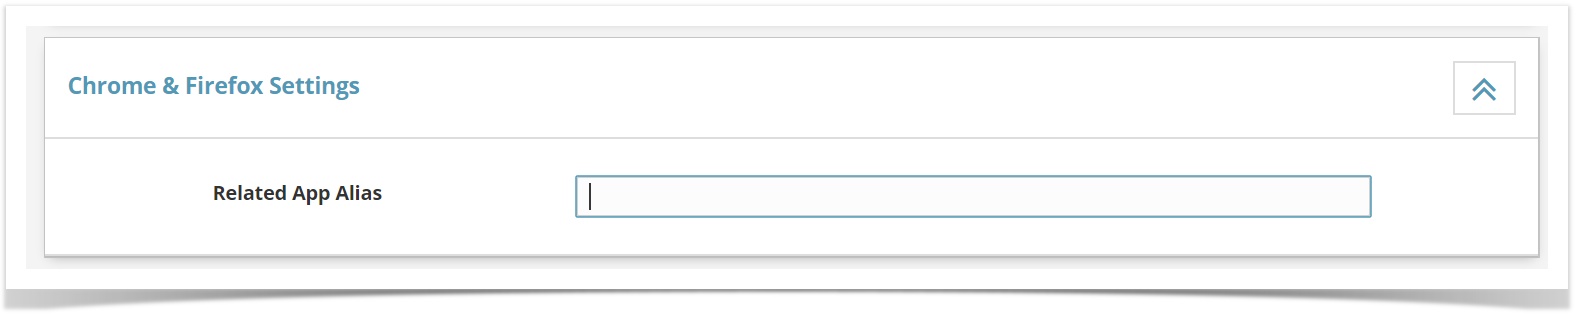
- Related App Alias: You should decide your Related App Alias. For example; related_webpushapp.
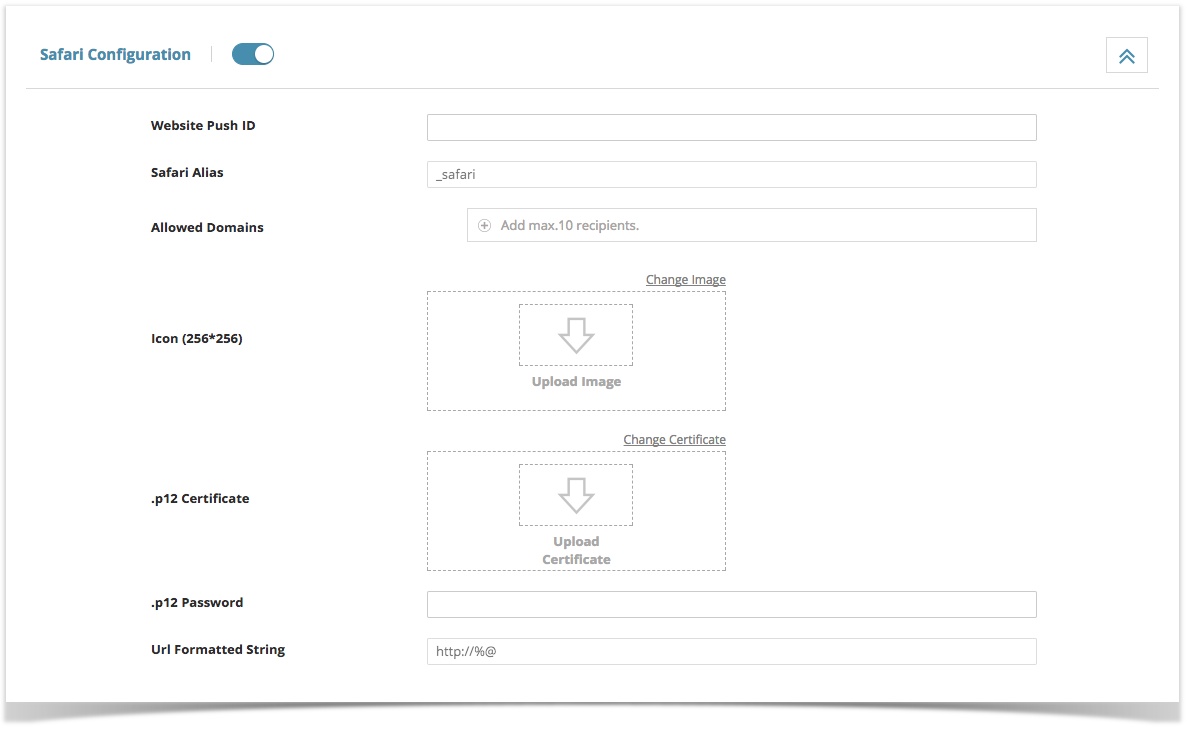
- Website Push ID :The push ID value obtained with the Apple Developer Account.
- Safari Alias: Your web application name alias for safari configuration.
It is highly recommended, put _safari after your Related App Alias (denoted on Chrome & Firefox settings part) while naming your application. Your Safari app will appear in the Websites field with the name you give here when you create a web push campaign.
- Allowed Domains: The websites addresses where users are allowed to request permission.
- Icon: Your website icon.
The icon must be 256×256 px.
- .p12 Certificate: Upload .p12 certificate created with Apple Developer Account.
- .p12 Password: The password for the .p12 file.
- Url Formatted String: Target URL to go to when the notification is clicked.
Use %@ as a placeholder for arguments you fill in when delivering your notification. This URL spelling must contain http or https; otherwise, it is invalid.
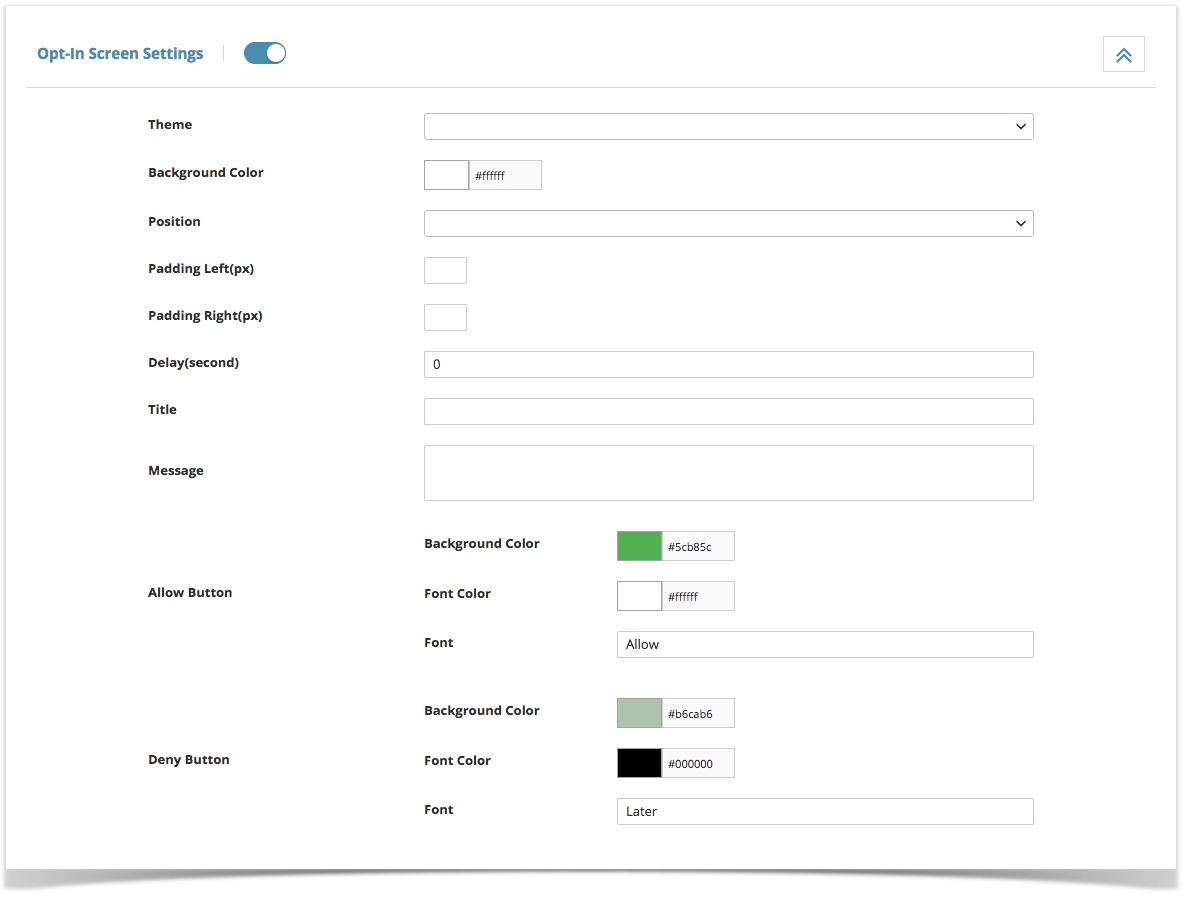
- Theme: Choose a theme for opt-in screen.
- Background Color: Choose a background color for opt-in screen.
- Position: The region where the opt-in screen will be displayed on the site.
- Padding Left (px): Enter a value if left space is required.
- Padding Right (px): Enter a value if right space is required.
- Delay (second): Enter a value if opt-in screen is desired to be shown after a while.
The duration starts when user starts their visit.
- Title: Enter a default title for opt-in screen.
- Message: Enter a default message for opt-in screen.
- Allow Button: Style configurations for sign up button.
- Background Color: Background color for sign-up button.
- Text Color: Text Color for sign-up button.
- Text: Enter the text for sign-up button. (eg, Allow, Accept, Yes etc.)
- Deny Button: Style configurations for reject button.
- Background Color: Background color for reject button.
- Text Color: Text Color for reject button.
- Text: Enter the text for sign-up button. (eg, Deny, Ignore, No etc.)
Opt-in Process
RMC, during web push subscription process, in case of non-member users wanting to join again, allows browsers to register via the Opt-In screen primarily instead of using native alerts.
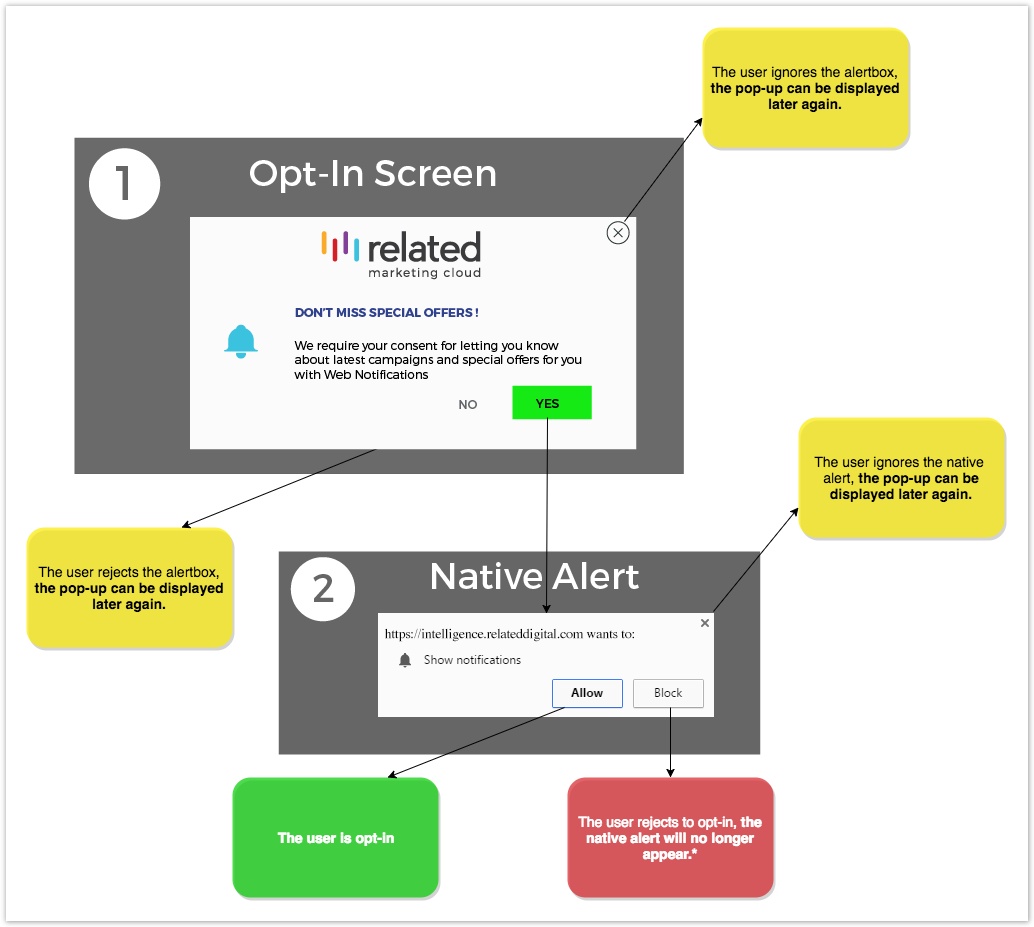
*If the visitor does not activate the notification approval from browser settings again.
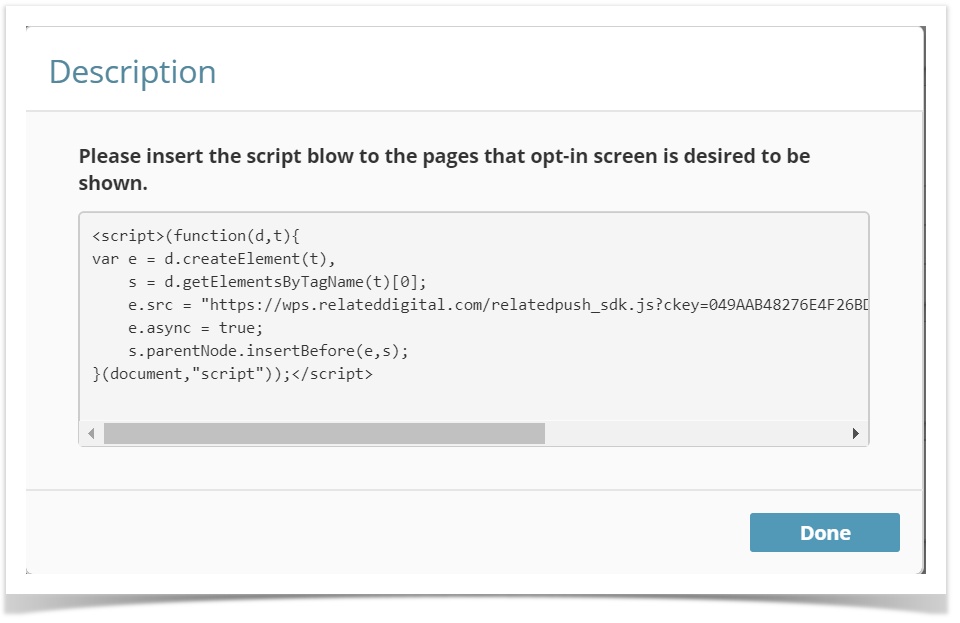
Add Codes and Files to Your Site
If your website supports HTTPS, you should add the relatedpush_sw.js file in the root folder of your site.
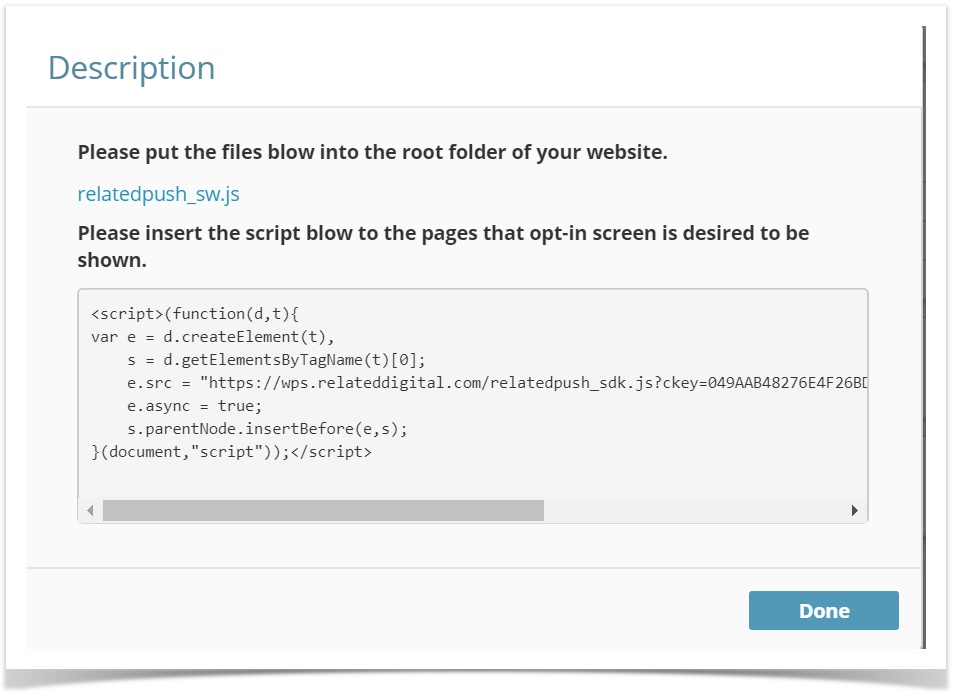
After completing the required fields, you will find scripts and files created specifically for your configuration on the pop-up. After these scripts and files are added to the places specified in the pop-up, the web push installation is completed. Now, you may proceed to Web Push - Create page to start your first web push campaign.