Web Push - Create
- Melih Ayhan (Unlicensed)
Campaign > Web Push > Create
- Click Campaign in the top menu bar, select Web Push and click on Create,
OR - Select an existing campaign from the Campaign Management Panel and click Copy to edit and create a similar campaign.
Creating the Message Content
You must fill in the following mandatory fields:
- Campaign Name – this will be the name of your campaign. We recommend that you use a name that uniquely identifies the campaign, and will allow you to recognise it quickly and easily.
- Title – this is the headline of the push message and usually is the piece of the text that visitor looks at while deciding whether or not to click on it, so choose it wisely to motivate action.
- Message – this is the body of the web push notification. It usually explains the details of the campaign to further motivate conversion.
- Target URL – helps visitors to understand where the message is coming from. Even though in most cases notifications direct subscribers to certain page (product categories, landing pages, promotional offers, etc.), only the domain name is displayed on a notification itself. The link address must start with "http://".
- Image – is the visual aspect of the message. You can enter the URL of the image you want to include in your notification. Even though the use of an image is not mandatory, we recommend using images in your messages since it gives you yet another change to capture subscriber's attention. If you are going to use an image, it is preferable to use one that represents the message. OPTIONAL
Adding Variables
The message content can also include personalisation variables based on profile attributes found in your Subscriber's Database.
Click 'Add Variables' to select the field to personalise within the title or body of your web push notification. Select the personalisation variable and enter an alternative message content to be displayed in case the variable does not exist for a given member.
For example, let's say you have selected the custom tag "member name" as the personalisation variable. When the notification is sent out the variable will replace the individuals name if it exists. If there is no member name, it will fall back on the "Alternative Message" content you have created.
Selecting a Website
Next, select the website(s) where you want to send your push notification.
If you do not see any available selection in this section, you need to add your websites. See RMC - Web Push for further instructions.
Saving your Campaign
Once you have created your Web Push Notification campaign click Save to continue to the next steps:
 – saves your campaign as Draft and redirects you to the "Campaign Management Panel", where you can manage your existing web push campaigns.
 – redirects you to the "Testing" page, where you can select a test list to send your campaign prior to delivery.
 – opens the "Define Audience" page, where you can select your target audience.
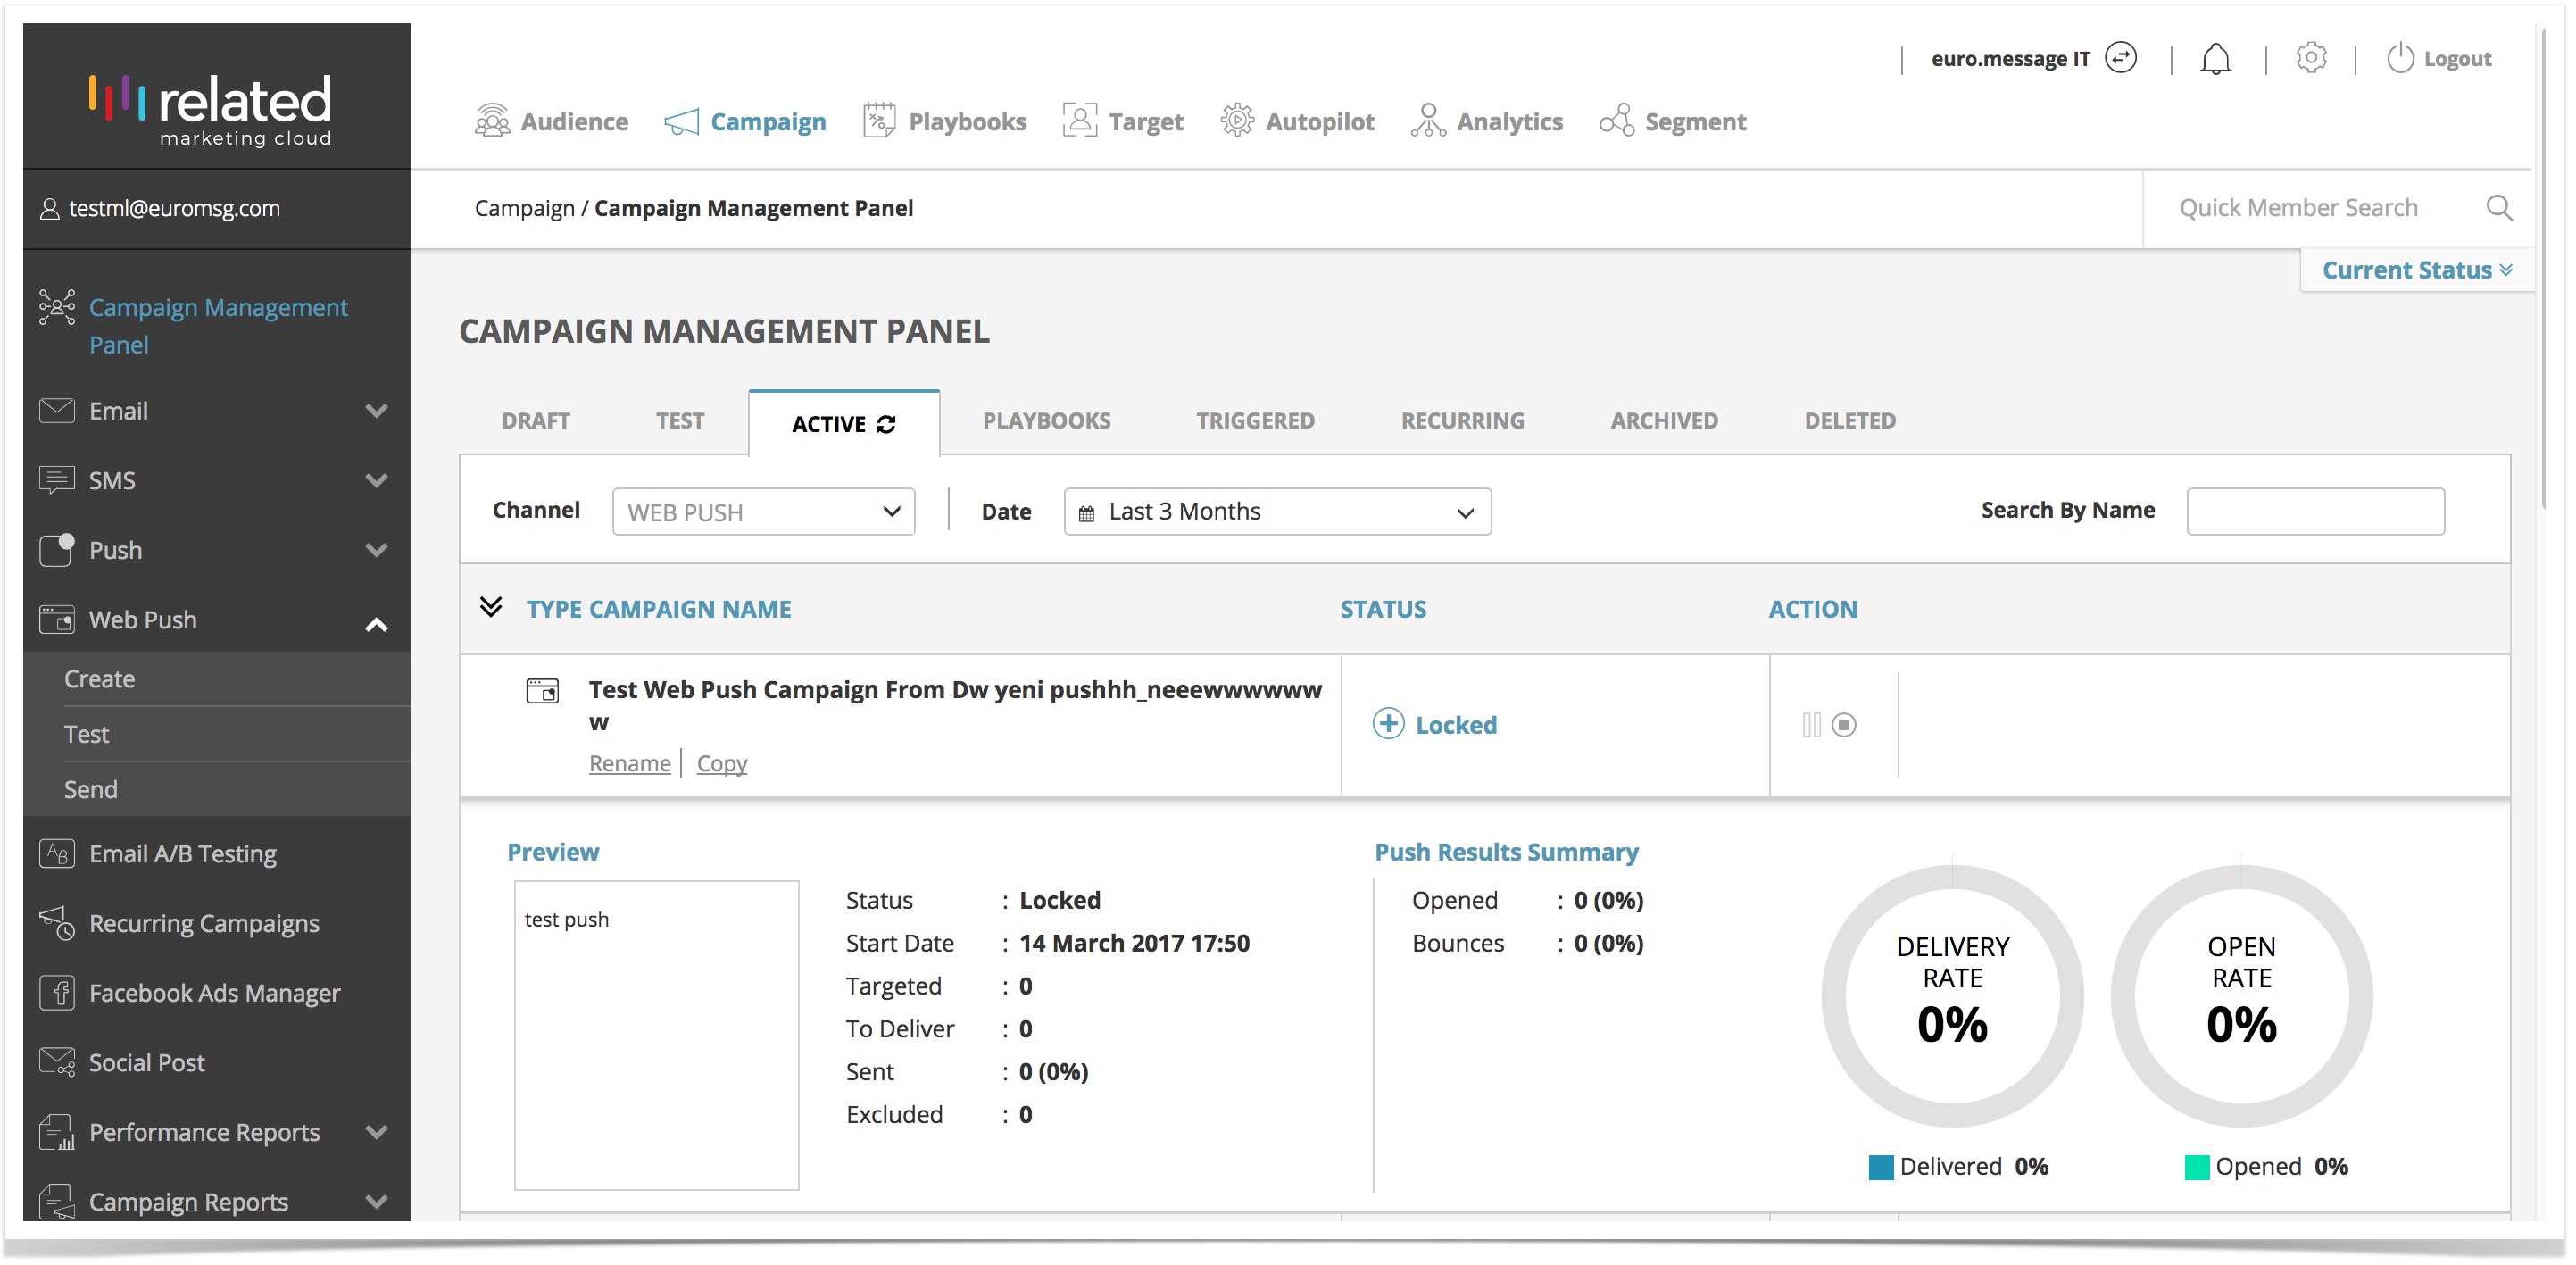
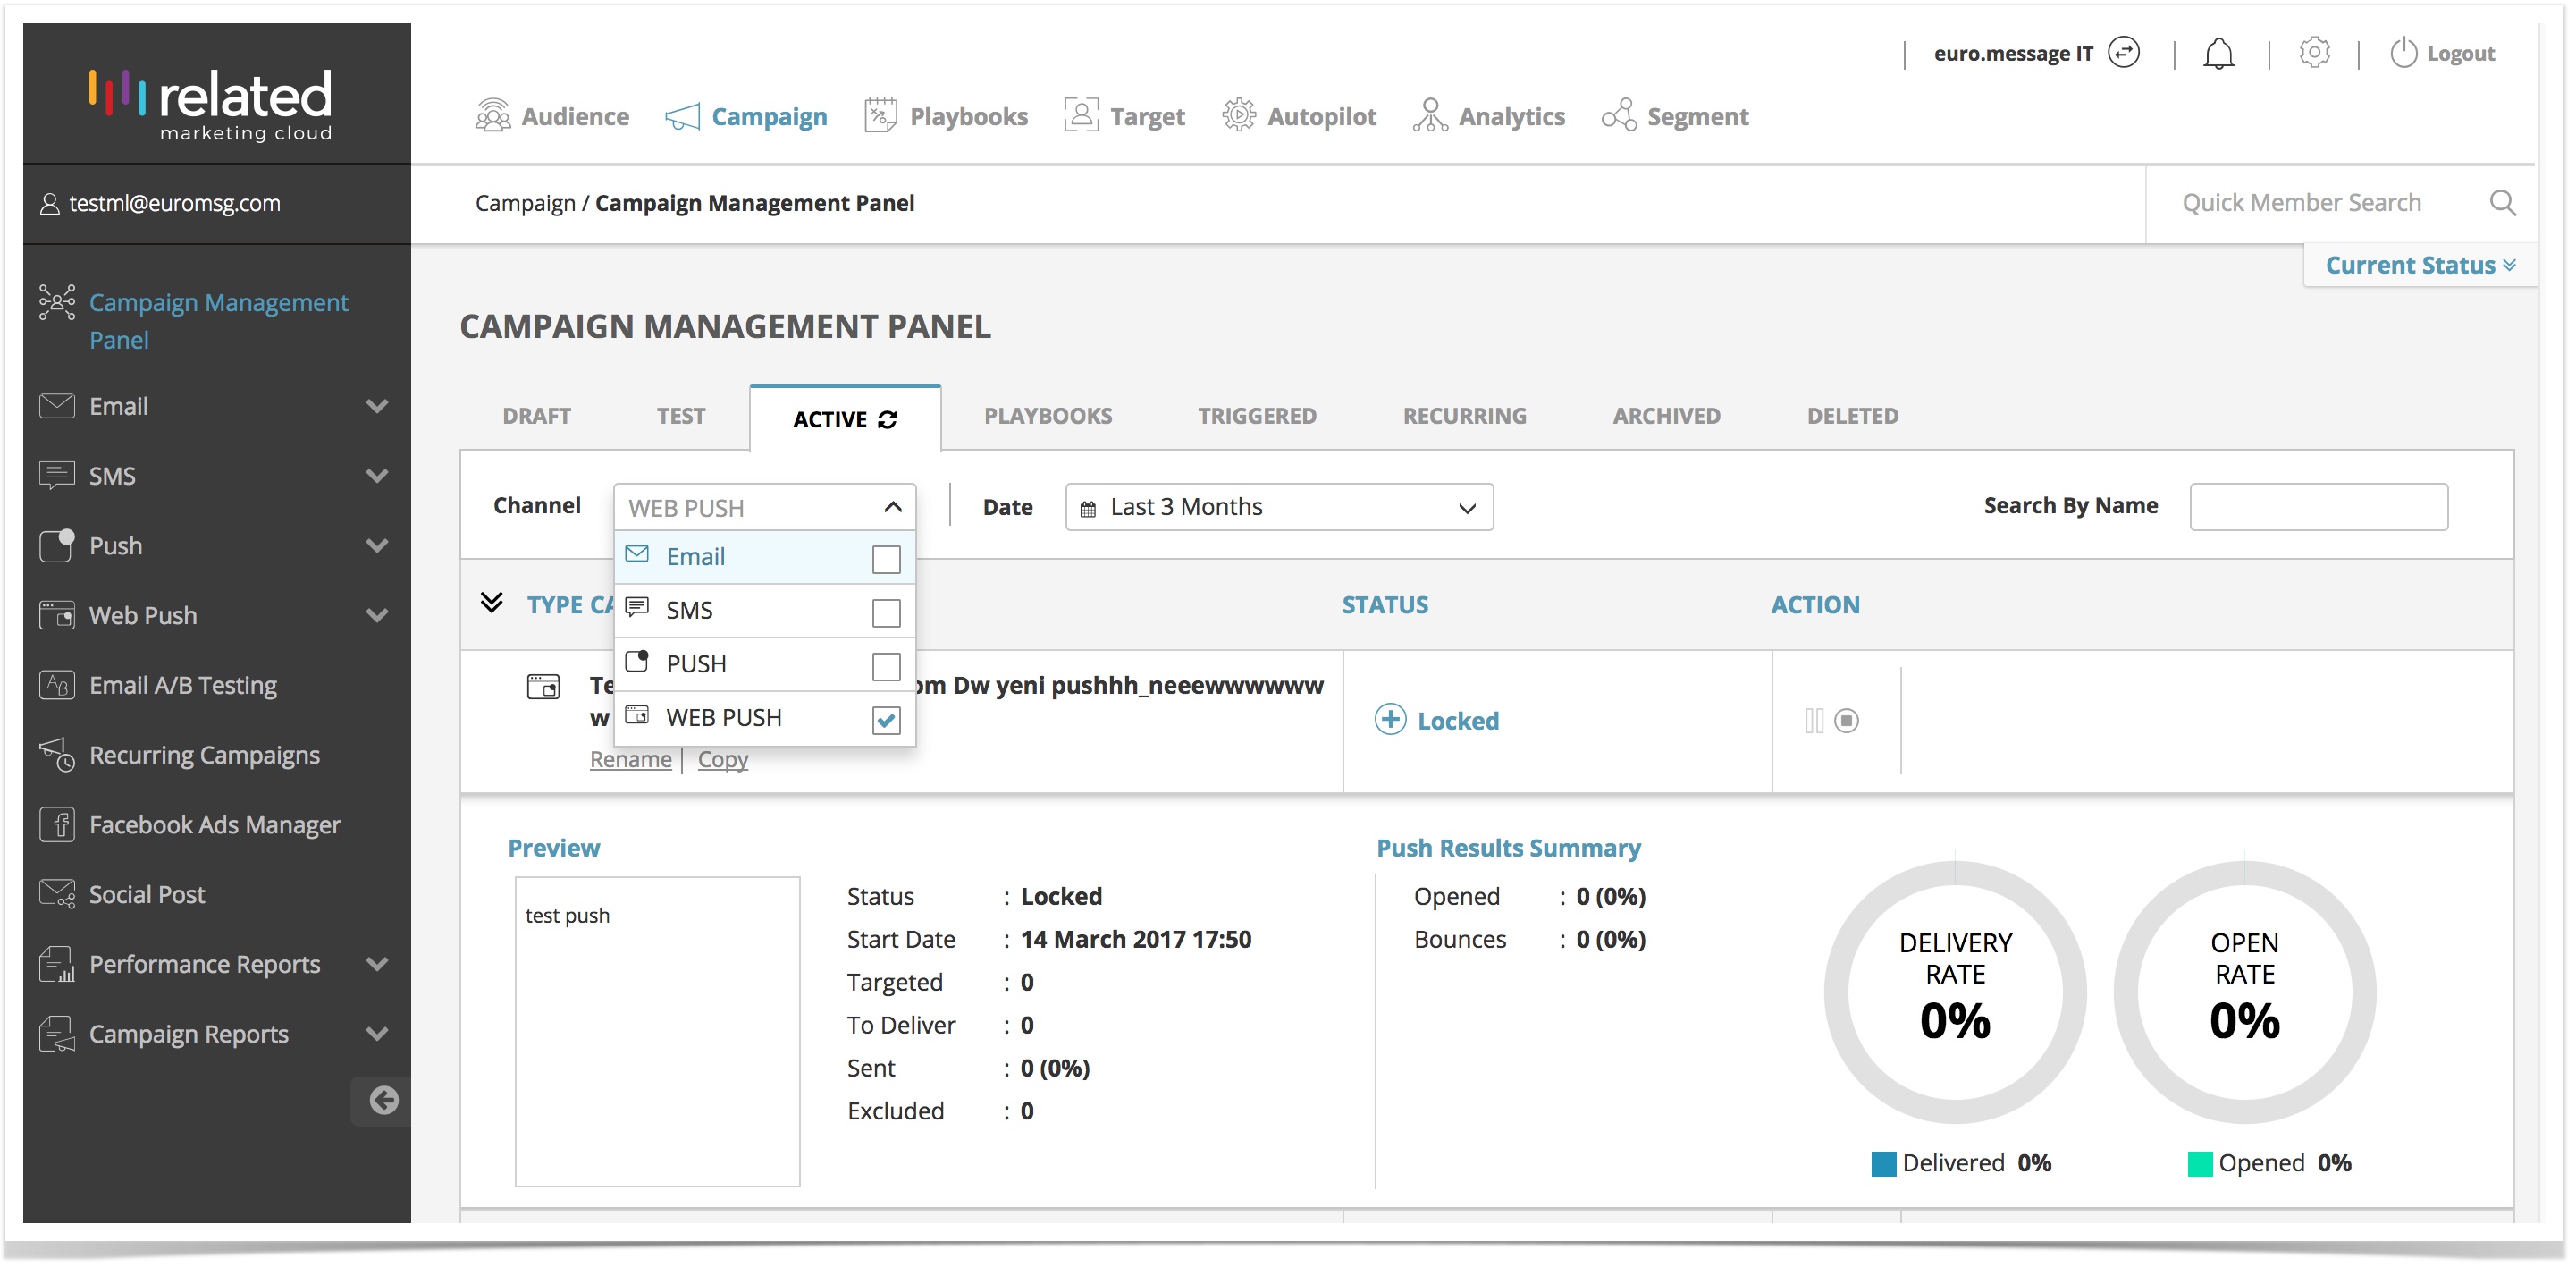
Managing your Existing Web Push Campaigns
You can view and manage your previously created Web Push Campaigns. Click on the "Active" tab and select web push to view the status of your active campaigns. You can also view the results of the campaigns you sent to a test list by clicking on the "Test" tab. Filter your campaigns by Date or Search by Name to list all of your current and past web push campaign.
Parent Topic: Web Push
Related content
Copyright 2020 Related Digital