Uploading Banners
- Melih Ayhan (Unlicensed)
- Egemen Gulkilik (Unlicensed)
- Candas Guler (Unlicensed)
Banner Integration
You must comply with the following rules to successfully load your Banners in batches:
- The file must be accessible through HTTP, HTTPS, FTP or SFTP.
- The file may be zip compressed.
- The file must be updated at least once a day
- There must be a header in the first line and the header titles must be the same with the ones written beside the column definition below.
- The file must be UTF-8 encoded.
- Use ‘;’ (semicolon) to separate columns.
Click here to download and view a sample CSV file.
Columns must be ordered in the following way:
All columns must be defined with a value. If a column does not have a value, it must be defined with a blank value.
| Column | Type | Header Title | ||
|---|---|---|---|---|
| 1. | Banner Code | TEXT, MAX CHAR: 100 | CODE | MANDATORY |
| 2. | Title | TITLE | OPTIONAL | |
| 3. | Banner File URL | TEXT, MAX CHAR: 500 | FILE_NAME (URL of the banner image file) | MANDATORY |
| 4. | Target URL | TEXT, MAX CHAR: 500 | TARGET_URL | OPTIONAL |
| 5. | Target Type | TEXT, MAX CHAR: 6 | TARGET_TYPE | OPTIONAL |
| 6. | Banner Text | TEXT, MAX CHAR: 500 | BANNER_TEXT | OPTIONAL |
| 7. | Group Code | TEXT, MAX CHAR: 50 | GROUP_CODE | OPTIONAL |
| 8. | Thumbnail File URL | TEXT, MAX CHAR: 500 | THUMBFILE_NAME | OPTIONAL |
| 9. | Category | TEXT | CATEGORY (separate multiple categories using pipe. Ex: 323|343|4543) | OPTIONAL |
| 10. | Zone ID | INTEGER | ZONE_ID | MANDATORY |
| 11. | Width | INTEGER | WIDTH | OPTIONAL |
| 12. | Height | INTEGER | HEIGHT | OPTIONAL |
| 13. | Valid From | DATE/TIME, 2016-05-05 13:10:00 | VALID_FROM | MANDATORY |
| 14. | Valid Through | DATE/TIME, 2016-05-05 13:10:00 | VALID_THROUGH | MANDATORY |
| 15. | Priority | INTEGER | PRIORITY | MANDATORY |
| 16. | Active | 1 or 0 | IS_ACTIVE | MANDATORY |
If you have additional attributes just add them as new columns to the file. If there are more than 1 value for a given attribute, separate values using a comma.
Once you have prepared the required file based on the rules and standards mentioned above, follow the following steps to validate it and schedule your automatic upload:
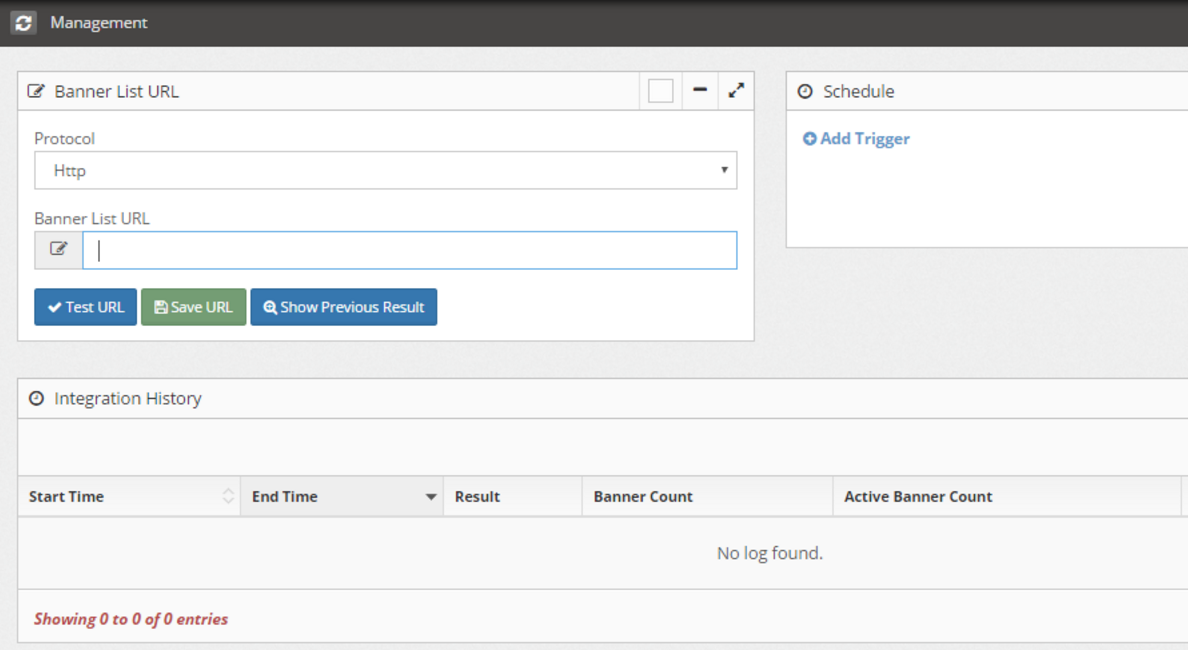
- Go to Personalize > Settings > Banner Integration.
Enter the URL for the CSV file you have created.
Click “Test URL” to validate the URL and file.
If you have no error in your Test Detail, click “Save URL”.
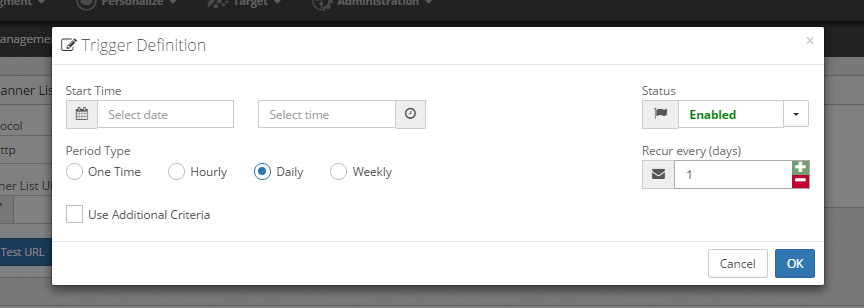
Click “Add Trigger” to schedule product data uploads. We recommend that you synchronize the campaign banner data generation and upload frequency.
Parent Topic: Sending Data to RMC
Related content
Copyright 2020 Related Digital